In the online world, where pictures really count, icons and images are like the superheroes of the web. When we build websites, we know icons and images can show feelings, share info, and just make things look cool. Ever thought about adding icons and images in your Divi menu? Well, this guide is here to help you do just that – add images and icons to your Divi menu. This guide has two steps: first, we’ll add images to the divi menu, and then, in the second step, we’ll add icons. So, get ready as we dive into making your Divi menu look awesome with these easy steps!
Step 1: Adding Images To Divi Menu
Want to make your menu more interesting? Well, here’s a thought: you can put pictures in the main menu, but the really cool spots are in the drop-down menu and mega menu. These places are like the VIP sections for your pictures! Imagine this: a picture you can click that takes you right to a product or a blog post. Cool, right? Let’s start and give your menu some awesome visual vibes!
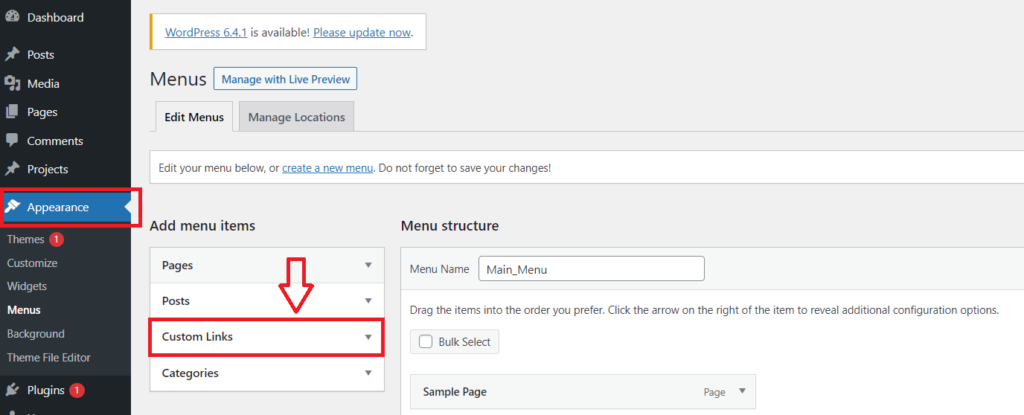
Time to work some magic on your WordPress dashboard! First, click on “Appearance” and then select “Menus”. You’ve got two choices here: make a new menu or jazz up an existing one with a cool image. Find your menu and look for “Custom Links” under “Add menu items”.
Creating a Custom Link
Now, for a quick trick to jazz up your menu! Put a hashtag # in the URL: box, and then hit the “Add to Menu” button.
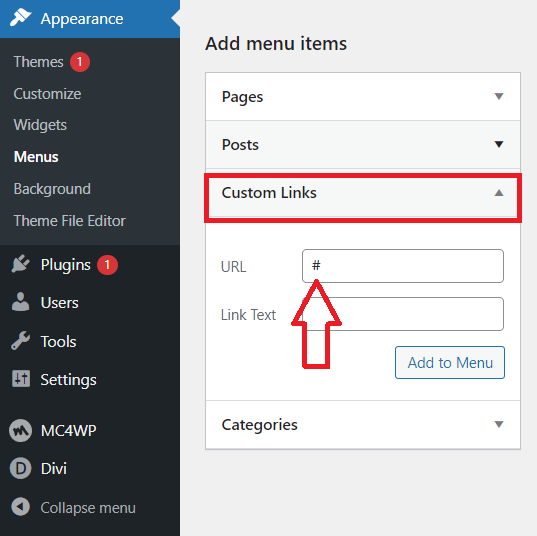
Putting a hashtag in the URL box
Let’s tweak the menu a bit for a more personalized touch! Choose your preferred main menu item, and under it, we’ll neatly arrange a custom link. Open up the menu item toggle to give us some space to work. Now, for the exciting part – we’re spicing things up by adding an image to our custom link menu item using a simple HTML image code. Just copy and paste the snippet provided below into the Navigation Label field. It’s an easy way to make your menu stand out with a unique touch!
<img src="Insert Image URL Here" alt="Alternate Text" />
Follow the below screenshot for more understanding:
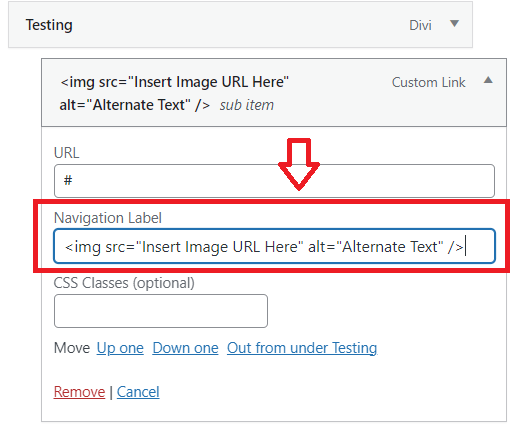
Adding HTML image code to navigation label
Before we move on, don’t forget to hit the ‘save’ button in the menu settings to lock in your changes. Now, for the final touch, let’s ensure the image URL in the code snippet is spot on. Head over to the Media Library – you can either upload a new picture or pick one you already have. This step is where we make sure the image you want is linked correctly.
Read More: Creating an Eye-Catching Hover Reveal Effect for the Divi Blurb Module
When you find the picture you like for your Divi menu, click on it. This takes you to the settings in WordPress media. Scroll down, and you’ll see “Copy Link” at the bottom. Just click on that to copy the link. This way, you’ve got the link ready to add your chosen image to the menu without any fuss!
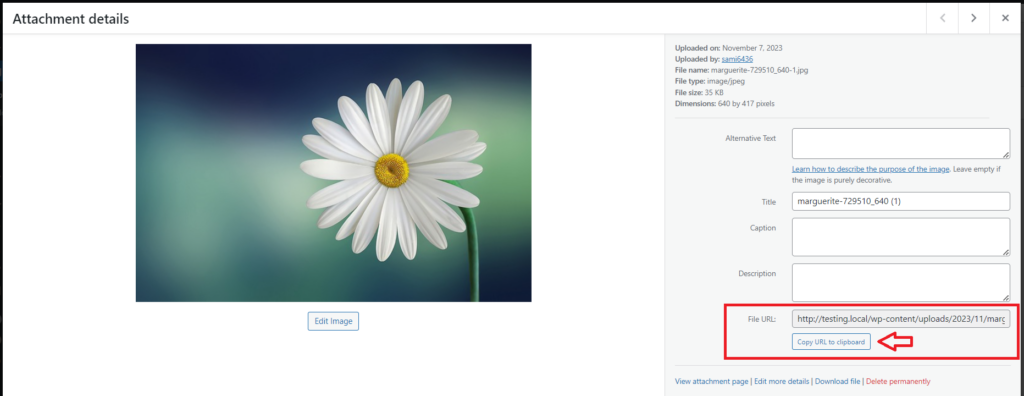
Image URL
Now go back to your menu where you pasted the image HTML in the previous step. You need to replace the text that says “Insert Image URL Here” with the link you just copied, it is also shown and highlighted in the image below:
Note: Don’t forget to save your menu after pasting the link!

Inserting image url to the custom link
Now, go and see how your menu looks. Check out the changes you made:
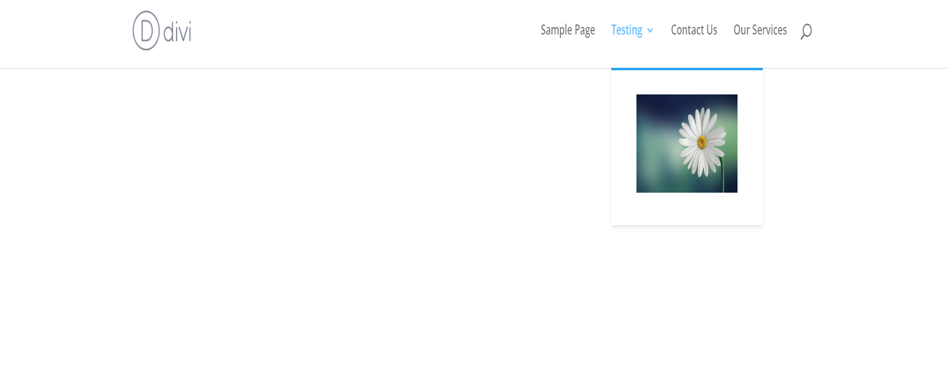
Image at the Menu
Read More: How To Add A Button To A Divi Blurb Module
Enhance the appearance of your Divi menu by adding style to the image!
Let’s simplify things as much as we can! Go back to your menu once more and check out the top corner for something called “Screen Options.” Click on that, and hunt for an option labeled “CSS Classes.” Make sure to tick that box—it’s essential. This simple step sets you up for an effortless way to target the image with CSS.

Enabling the CSS classes from the screen option
Now that you’ve got your image in place on the menu item, it’s time to add a little extra style! Look out for a new field called CSS Class (optional) within that specific menu item with the image. Here’s where you can give it a special tag, something straightforward like “menu-image” in this example. It’s a neat way to make your menu item look even cooler!
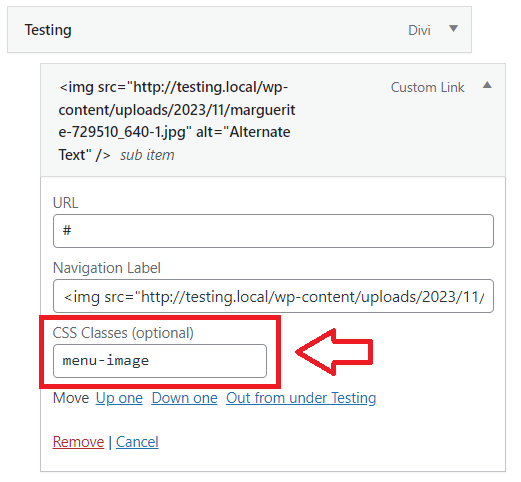
Adding CSS class to the custom link
Apply Custom CSS To The Image
Now, let’s dive into the exciting part – giving your image a personal touch with CSS styles! No need to stick to strict rules here – feel free to have some fun experimenting until you achieve the perfect look. If you’re keen on using our CSS, just copy and paste the code provided below into Divi>Theme Options>Custom CSS code box.
.menu-image img {
    border-radius: 10px;
}

.menu-image a {
    padding: 0!important;
}

.menu-image a:hover {
    opacity: 1!important;
}
Final Look After Adding the CSS
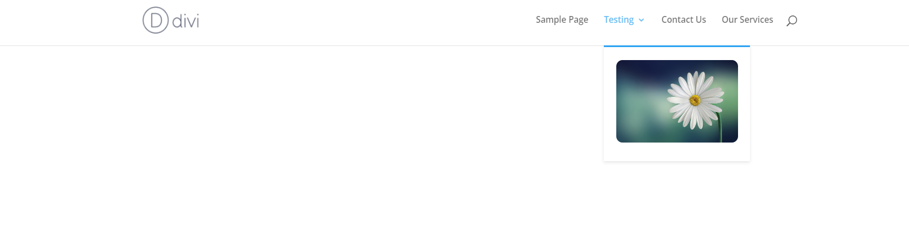
Final look of the menu after inserting the image
Now that we’ve finished adding images to the Divi menu, it’s time to move on to the next step: adding icons. In the next section, we’ll learn how to put those little pictures into your menu. Get set to make your menu look even cooler with these icons!
Read More: Replace the Divi Blurb Icon With a Font Awesome Icon: A Step-by-step Guide
Second Step: Add Icons To The Divi Menu
Icons can really spice up your menu and make things interesting. The perfect icon not only hints at what the link is about but also adds a nice touch of reality.
Add Icons To The Divi Top Level Menu
The CSS code you see here is for the main menu items. Whether you’re using the standard Divi module, the Theme Builder, or any other place with the Menu module, this code will do the trick. Once you’ve copied and pasted it, we will talk more about tweaking it to suit your style – like changing the icon or adjusting the color. Paste this code in your Divi>Theme Options>Custom CSS code box.
  nav li a:before {
    font-family: 'ETMODULES';
    content: '\24';
    text-align: center;
    vertical-align: middle;
    margin-right: 10px;
    margin-left: -10px;
    color: #2cba6c;
    font-size: 1em;
    transition: all .3s ease;
  }
Add Icons To The Divi Submenu
Here’s where the magic happens for your submenu! This snippet is all about adding icons to the links that pop up in your Divi menu’s dropdown. Whether it’s in the Menu module or the regular menu, the process is the same. All you need to do is copy and paste this code into your Divi>Theme Options>Custom CSS code box.
nav li li a:before {
    font-family: 'ETMODULES';
    content: '\24';
    text-align: center;
    vertical-align: middle;
    margin-right: 10px;
    margin-left: -10px;
    color: #2cba6c;
    font-size: 1em;
    transition: all .3s ease;
 }
Customizing The Icons For Each Menu Items
Up until now, the code we’ve used would add the same icon to all the main menu or submenu links. Maybe that’s perfect for your site, and it does wonders on mine too. But here’s the fun part – you can actually set a different icon for every menu item. It’s easy; you just need to add a new CSS class for each menu item. Let us show you how to make each menu item stand out with its unique icon!
Take a look at the image below, illustrating the process of adding a CSS tag to a submenu item.
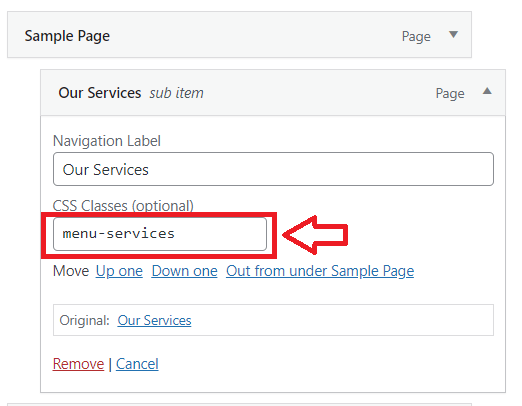
Adding a CSS class to the sub menu item
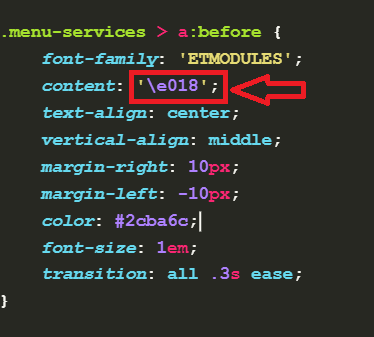
Now, let’s focus on the menu item we tagged as “menu-services”. We’re aiming to include an icon, so we’ll incorporate “\e018” into the CSS snippet. Simply follow these steps: copy the code below and paste it into Divi > Theme Options > Custom CSS code box.
.menu-services > a:before {
    font-family: 'ETMODULES';
    content: '\e018';
    text-align: center;
    vertical-align: middle;
    margin-right: 10px;
    margin-left: -10px;
    color: #2cba6c;
    font-size: 1em;
    transition: all .3s ease;
}
Read More: How to Rearrange the Divi Blurb Module: Placing the Title Above the Image
Final Look of the Menu:
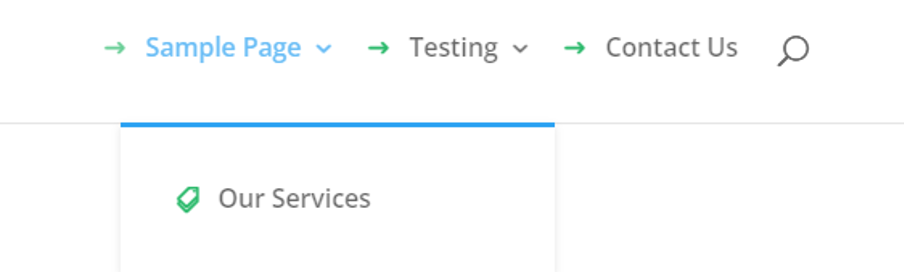
Insertion of icon at the menu
How To Choose The Icons For The Divi Menu
Now, let’s talk about the next step: changing the icon. You have the fun part of picking an icon, and you’ve got two cool options. You can choose from Divi’s own ETModules icon font family or Font Awesome icon font family. When it comes to icons for your Divi menu Module, there are lots of good ones to consider. We’ll focus on two in this guide—one that’s already in Divi and another that’s easy to add. Now let’s discuss each part in detail:
1. ETModules
So, in Divi, there’s a set of icons that are ready to use right away. You don’t need to do anything special to get them working. All you have to do is pick the icon you want and then use it. Curious about all the icons in Divi? You can find the complete list on this blog. It’s a great way to explore and see all the awesome icons available to use!
In the code snippets, we already have “font-family: ‘ETMODULES’;” as the font family, so if you use any of these icons you won’t have to change anything. You can choose any icon you want. Check out these examples of icons available for use:
In the code snippets, we already have “font-family: ‘ETMODULES’;” as the font family, so if you use any of these icons you won’t have to change anything. You can choose any icon you want. Check out these examples of icons available for use:
ETModules screenshot
Check out this screenshot showcasing a bunch of available icons. Now, the tricky part might be the icon code. But guess what? You can ignore the first bit of the code, the &#x part. So, for instance, if you like the third icon, all you need is “23” to get that arrow. It’s a neat little trick to simplify using these icons! Lets understand this from the following screenshot:
Replacing the the icon code
2. Font Awesome
Ready for more icon magic? Now, there’s another set of icons at your disposal, and they come from Font Awesome. If Font Awesome is already integrated in your website, great news – you’re all set! But if not, no worries. We’ve got your back with a tutorial on How To Add Font Awesome To Divi. Let’s make your website even more awesome with these icons!
If you’re looking to use a Font Awesome icon instead, it’s pretty easy to switch things up. All you’ve got to do is tweak a couple of things in the code snippet. First, swap out “ETModules” with “Font Awesome 5 Free” – that’s the font family.
Next up, the line with the icon code: instead of “23” (ETModule Code), that you have recently used, you’ll need to put in the code specific to the Font Awesome icon you want to use. Just head over to Font Awesome’s library, pick an icon, and click on it. Then, copy the Unicode they show you. It’s a simple way to customize your icons with Font Awesome, as shown in the image below:
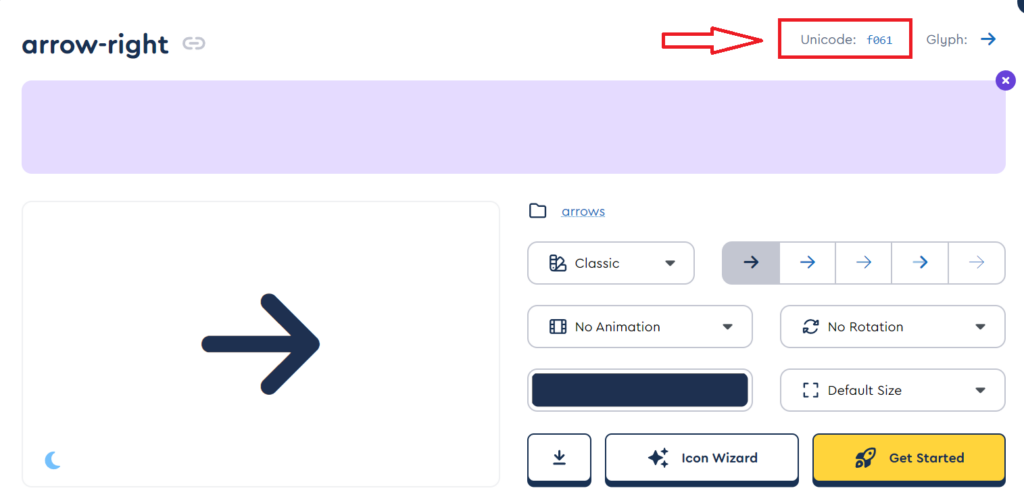
Font Awesome icon code
Conclusion:
In summary, this guide empowers you to enhance your Divi menu by adding images and icons. The first step covers incorporating images strategically, turning your menu into a dynamic visual element. Customizable CSS styles further allow you to personalize the appearance.
Moving on to icons, the second step provides CSS code for both main and submenu items, enabling seamless integration. Customization options allow you to add a unique icon to each menu item. Choose between Divi’s ETModules or Font Awesome for versatile icon selections.
In conclusion, by following these steps, you can transform your Divi menu into a visually appealing and user-friendly navigation feature. Experiment with images, icons, and styles to create a memorable and creative menu that enhances your website’s overall user experience. Happy designing!
Read More: Fixing Divi Bugs: Effective Solutions and Troubleshooting


0 Comments