Adding a button to a Divi Blurb module can be really useful, especially when the Blurb’s style doesn’t let you add a separate Button module. To make it happen, we’ll use a basic HTML link and some CSS right inside the Blurb module’s text area. In this quick guide, we’ll show you how to link up your Divi Blurb and make it look like a button.
Step 1: Create a Blurb Module
To begin, place the Divi Blurb module in your layout and make it your own by adding the image you like, the title text, and the body text. Once you’ve got that part sorted, let’s move on to the fun stuff – adding a button to your Blurb!
Step 2: Add A Span Tag To The Blurb Content
Now, let’s tackle the second step. To do this, you’ll need to insert a “span” tag into the Body Text section of your Divi Blurb module. Here’s how to get it done:
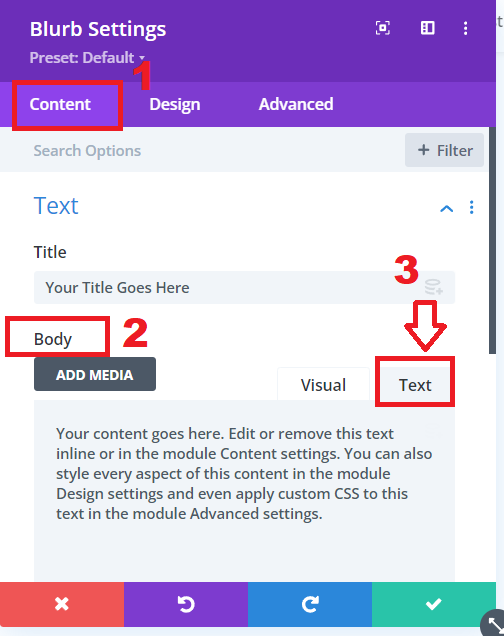
- Access the Blurb module settings.
- Scroll down to the “Body” text area.
- Switch from the default “Visual” tab to the “Text” tab. Think of this tab as your code editor space, where you can work with HTML.
Blurb Module Setting
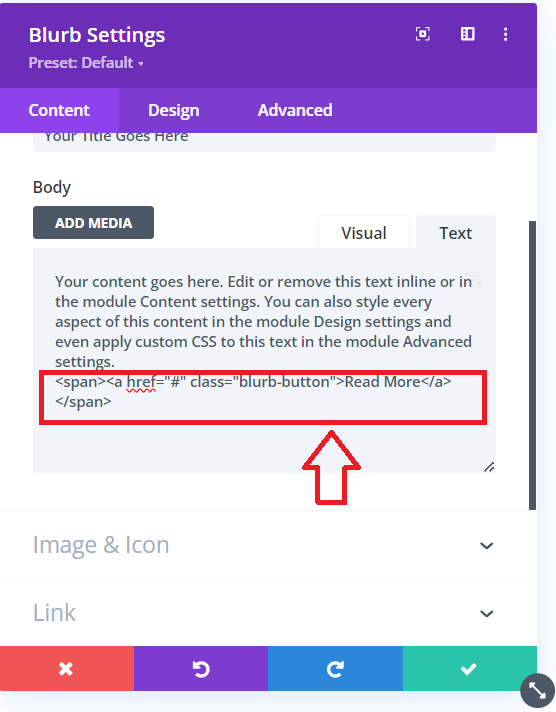
It’s time to take the next step. Copy the following span tag and simply paste it into the Blurb Body text area. Here’s how to do it:
<span><a href= "#" class="blurb-button">Read More</a></span>
Inserting the span tag
3rd Step: Customize the Button
Inside the span tag, you’ll find three important elements: Button URL, Custom CSS Class, and Button Text. The good news is, that you can personalize and customize each of these as described below.
Button URL
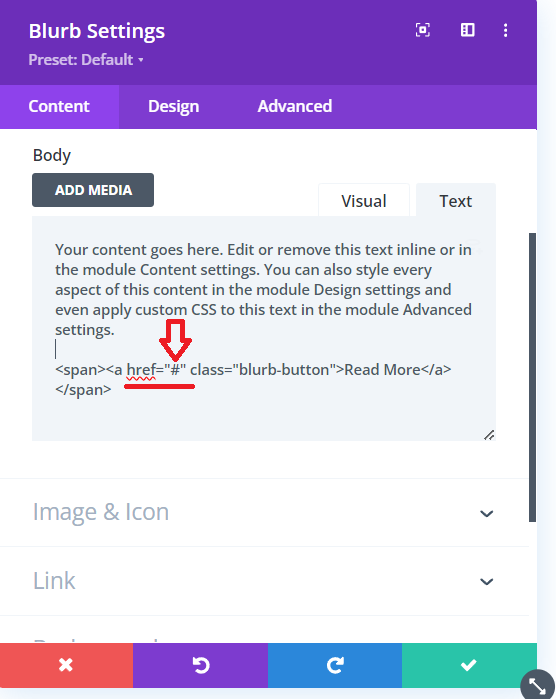
In the span tag, the initial component is the “a href” part, which serves as the anchor link. This link determines where the button will take your website visitors when they click on it. Right now, it’s represented by a “#” symbol as a placeholder, but it’s crucial to replace that with your specific web address enclosed within the quotation marks (“”).
Button Url of the Span Tag
Read More: Adding a Scroll Down Hover Effect in Divi Website – Step-by-Step Guide
Custom CSS Class
Now, moving on to the second segment of the span tag – the custom CSS class. We’ve included a special class known as “blurb-button” to pinpoint the link and apply styling that transforms it into a button, giving it a familiar button-like appearance.

Custom CSS Class
Button Text
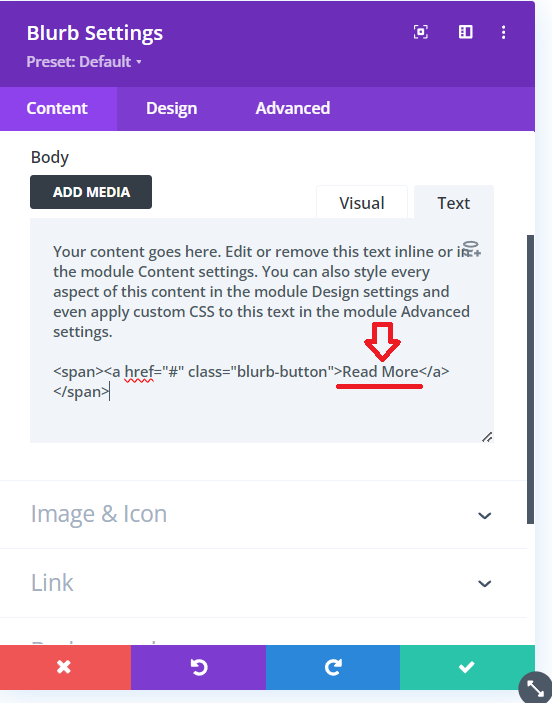
Lastly, let’s talk about the third element in the span tag – the text that appears on the button. For now, we’ve put a temporary label of “Read Here,” but it’s essential to customize this text to make it fit your needs. Simply replace the text found within the quotation marks (“”) with your preferred button label.
Button Text
Read More: How To Create a Blog or News Website with Divi
4th Step: Style The Blurb Button With CSS
Let’s make those Blurb links look like actual buttons – a simple CSS tweak will do the trick. Since we’ve already set up the custom CSS class, we can now focus on targeting it in the code and applying the desired styling values. It’s all about customizing your buttons to stand out the way you want. Paste the following code in your Divi>Theme Options>Custom CSS code box.
a.blurb-button {
    color: #ffffff;
    background: #0071fc;
    border: 2px solid #0070fc;
    padding: .7em 1.3em;
    margin-top: 20px;
    border-radius: 50px;
    text-transform: capitalize;
    display: inline-block;
    transition: all 0.3s ease-in-out;
}


/*style the Divi Blurb link text as a button on hover*/


a.blurb-button:hover {
    background: transparent;
    color: #0070fc;
    border: 2px solid #0070fc;
    cursor: pointer;
    transition: all 0.3s ease-in-out;
}
Blurb Module After Adding the Button
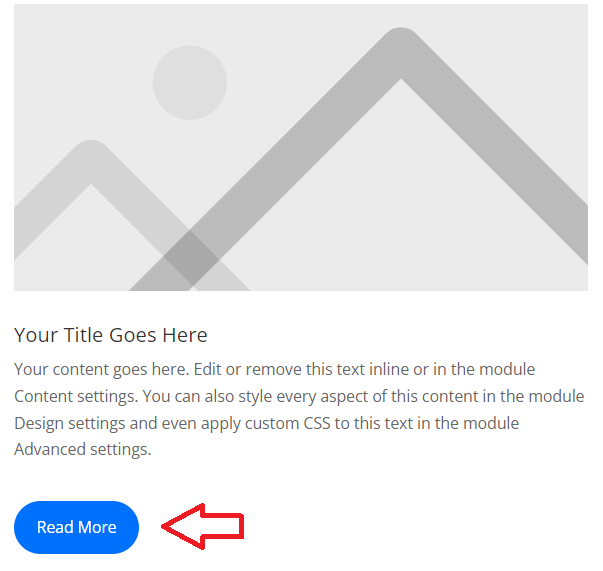
Blurb Module After adding button
Go ahead and personalize the CSS to match your website’s style. Think of this as a starting point, and you can modify it to suit your preferences. Just remember, if you want different button styles for various Blurb modules, make sure to adjust the CSS in both the span tag and the overall CSS to keep everything coordinated. This ensures each Blurb module has its distinct button style.
Conclusion:
Nice job on adding a button to your Divi Blurb module! You’ve made your Blurb more interesting and interactive with just a few steps. Remember, what you did is like the beginning of a painting—there’s more you can do to make it uniquely yours.
As you keep working on your website, feel free to adjust the button’s look to match your style. Think of it as coloring in a coloring book—make it suit your taste! The cool part is, you can make each Blurb module stand out by giving it its own special button style.
Don’t be afraid to play around and customize it according to your needs. And if you ever want different buttons for different Blurbs, just make sure to tweak the settings in both the span tag and the overall CSS. That way, your website looks polished and cool.
Read More: Replace the Divi Blurb Icon With a Font Awesome Icon: A Step-by-step Guide


0 Comments