Have you ever wanted to sell Divi child themes but did not know where to start? How about repackaging existing Divi websites you have into a child theme you can put up for sale? If you have ever looked for a tutorial or guide on how to package up a Divi child theme, you may have discovered that not many exist. In this article we are aiming to change that by teaching you how to package up your Divi child theme for sale.
Also check out our other recent posts on creating a child theme and our child theme generator.
What is a Divi child theme package?
A Divi child theme package is a collection of files and resources that can include images, styles, functions, templates, and more that collectively create a full child theme. All of these files are zipped up and are ready to be installed as a child theme for Divi.
Files, plugins, and steps necessary to create a Divi child theme package for sale
In this tutorial we’re going to cover all the steps necessary to package up a Divi child theme. This will include a number of different files and plugins. A summary is below:
- Exporting theme settings and content
- Exporting widgets
- Exporting content
- Exporting theme customizer settings
- Setting up one click install
- Adding one click install files
- Preparing functions.php
- Packaging it all up for sale
- What files you need
- Zipping it up
In the following sections we’ll take a look at each of these steps and their purpose. If this is your first time packing up a child theme for sale, I highly recommend you follow along with this tutorial step-by-step so you fully understand the package you’ll be creating.
Step 1 – Export Theme Settings and Content
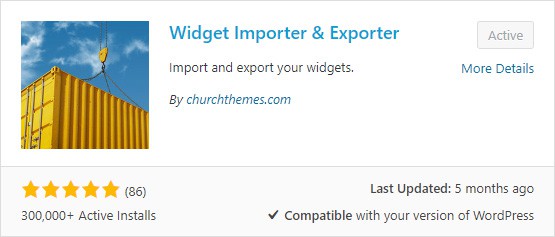
Install Widget Importer & Exporter Plugin
First we’re going to download and install the Widget Importer and Exporter Plugin. In the WordPress back-end search for Widget Importer and Exporter and click install and then activate the plugin.
Export Widgets
After you have installed the Widget Importer and Exporter plugin, go to Tools > Widget Importer and Exporter. Once there, click Export Widgets.
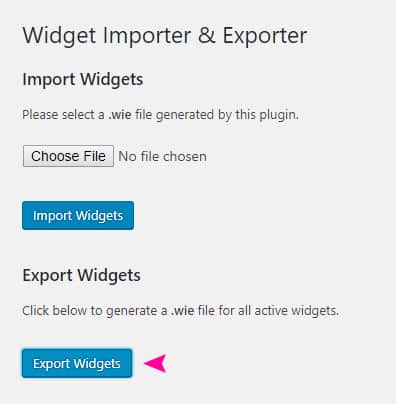
At this point you should have a widget export file called something like theme.divicake.com-widgets. For simplicities sake, go ahead and rename that to just widgets.
Hooray! You now have your widgets.wie file.
Export Content
Next we’re going to export the website content. Go to Tools > Export and click Download Export File.
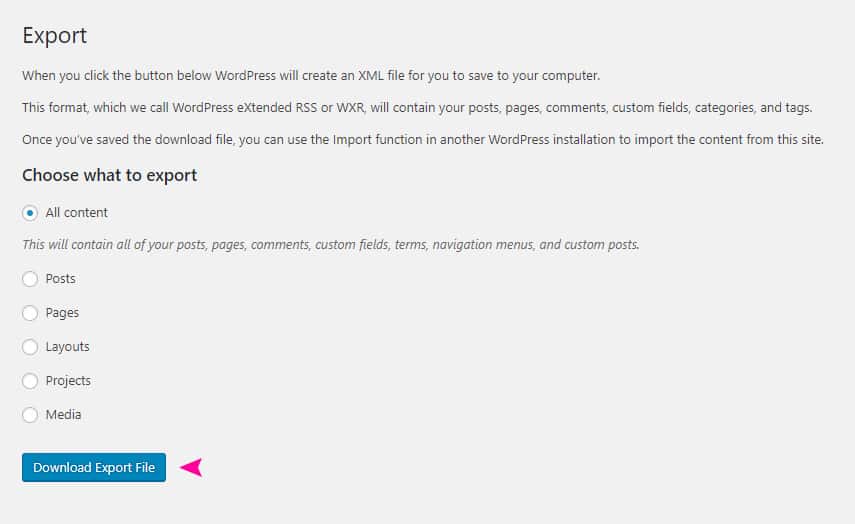
At this point you should have a content export file called something like theme.wordpress.2017-07-21. For simplicities sake, go ahead and rename that to just content.
Hooray! You now have your content.xml file.
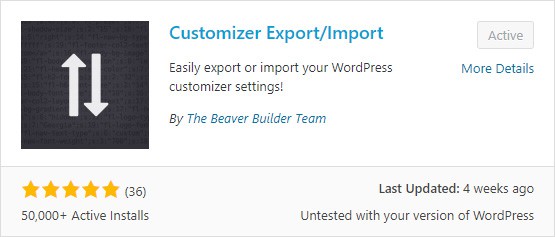
Install Customizer Export/Import Plugin
Next we’re going to download and install the Customizer Export/Import plugin. In the WordPress back-end search for Customizer Export/Import and click install and then activate the plugin.
Export Theme Customizer Settings
After you have installed the Customizer Export/Import plugin, go to Appearance > Customize. Once there, click Export/Import and then click Export.
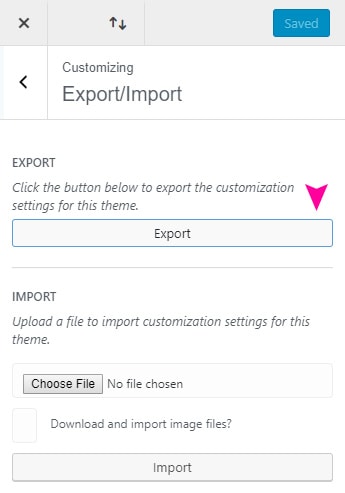
At this point you should have a customizer settings export file called something like theme-export.dat. For simplicities sake, go ahead and rename that to just customizer.dat.
Hooray! You now have your customizer.dat file.
Step 2 – Set Up One Click Install
Generate one click install activation file
Visit http://tgmpluginactivation.com/download/ and fill out the required information. An example is below. Make sure to use your own theme name. Click Generate once you’ve filled out the form.
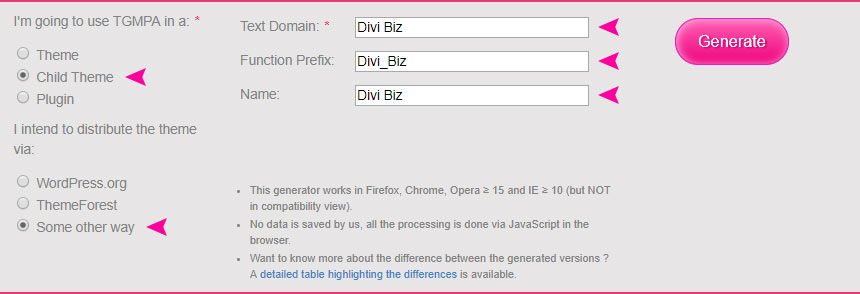
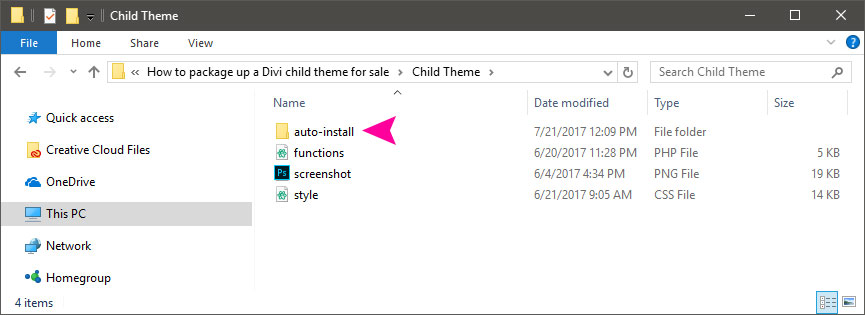
At this point you should have a zip file called something like TGM-Plugin-Activation-2.6.10-your-theme-name.zip. Go ahead and open up that zip file and locate the file called class-tgm-plugin-activation.php. In your child theme directory, create a new folder called auto-install and place the class-tgm-plugin-activation.php in it.
Prepare functions.php for one-click install
Locate your functions.php in your child theme folder and open it in your preferred code editor. We’re going to add a few code blocks to:
- activate the one click install
- register the required plugins
- import the files
- reset the widgets
- assign menus and set the home page.
Activate the one click install
Add this to your functions.php file.
// One click demo import activation
require_once get_stylesheet_directory() . '/auto-install/class-tgm-plugin-activation.php';
add_action( 'tgmpa_register', 'your_theme_name_register_required_plugins' );
Make sure to replace every instance of your_theme_name with your theme name.
Register the required plugins
Add this to your functions.php below the one click install code
// Register the required plugins for this theme
function your_theme_name_register_required_plugins() {
	$plugins = array( // Include the One Click Demo Import plugin from the WordPress repo
		array(
			'name' => 'One Click Demo Import',
			'slug' => 'one-click-demo-import',
			'required' => true,
		) ,
	);
	$config = array(
		'id'           => 'your_theme_name',       // Unique ID for hashing notices for multiple instances of TGMPA.
		'default_path' => '',                      // Default absolute path to bundled plugins.
		'menu'         => 'tgmpa-install-plugins', // Menu slug.
		'parent_slug'  => 'themes.php',            // Parent menu slug.
		'capability'   => 'edit_theme_options',    // Capability needed to view plugin install page, should be a capability associated with the parent menu used.
		'has_notices'  => true,                    // Show admin notices or not.
		'dismissable'  => true,                    // If false, a user cannot dismiss the nag message.
		'dismiss_msg'  => '',                      // If 'dismissable' is false, this message will be output at top of nag.
		'is_automatic' => true,                    // Automatically activate plugins after installation or not.
		'message'      => '',                      // Message to output right before the plugins table.
	);
	tgmpa($plugins, $config);
}
Make sure to replace every instance of your_theme_name with your theme name. If you have additional plugins that need to be installed, copy and paste the first array and replace with the appropriate information.
Import the files
Note: If you’re distributing a Divi child theme for sale, you’ll need to publicly host the files you just created so that they can be imported from the plugin.
Add this to your functions.php below the registration of plugins code.
// Import all the files
function ocdi_import_files() {
	return array(
		array(
			'import_file_name' => 'Your Theme Name Import',
			'import_file_url' => 'YOUR_URL/content.xml',
			'import_widget_file_url' => 'YOUR_URL/widgets.wie',
			'import_customizer_file_url' => 'YOUR_URL/customizer.dat',
			'import_preview_image_url' => 'YOUR_URL/screenshot.png',
			'import_notice' => __( 'Please waiting for a few minutes, do not close the window or refresh the page until the data is imported.', 'your_theme_name' ),
		),
	);
}
add_filter('pt-ocdi/import_files', 'ocdi_import_files');
Make sure to replace every instance of your_theme_name with your theme name. Replace YOUR_URL with the url where the files you just created will be stored.
Reset the widgets
Add this to your functions.php below the import files code.
// Reset the standard WordPress widgets
function ocdi_before_widgets_import($selected_import) {
	if (!get_option('acme_cleared_widgets')) {
		update_option('sidebars_widgets', array());
		update_option('acme_cleared_widgets', true);
	}
}
add_action('pt-ocdi/before_widgets_import', 'ocdi_before_widgets_import');
Assign the menus and set the home page
Add this to your functions.php below the reset widgets code.
function ocdi_after_import_setup() {
  $main_menu = get_term_by( 'name', 'Main Menu', 'nav_menu' );
	$secondary_menu = get_term_by( 'name', 'Secondary Menu', 'nav_menu' );
    set_theme_mod( 'nav_menu_locations', array(
'primary-menu' => $main_menu->term_id,
'secondary-menu' => $secondary_menu->term_id,
        )
    );
		// Assign home page and posts page (blog page).
    $front_page_id = get_page_by_title( 'Home' );
    update_option( 'show_on_front', 'page' );
    update_option( 'page_on_front', $front_page_id->ID );
}
add_action( 'pt-ocdi/after_import', 'ocdi_after_import_setup' );
If your menu names are different than Main Menu and Secondary Menu, make sure to replace them in the code.
If your home page name is different than Home, make sure to replace it in the code.
Optional: Disable plugin branding (white-labeling)
Add this to your functions.php below the registration of plugins code.
// Disable plugin branding
add_filter('pt-ocdi/disable_pt_branding', '__return_true');
Hooray! You are all done with the functions.php file. Make sure to save it!
If you would like to learn more about the configurations options for the TGM Plugin Activation plugin, check them out here: http://tgmpluginactivation.com/configuration/
Step 3 – Packaging it all up
Files and folder structure
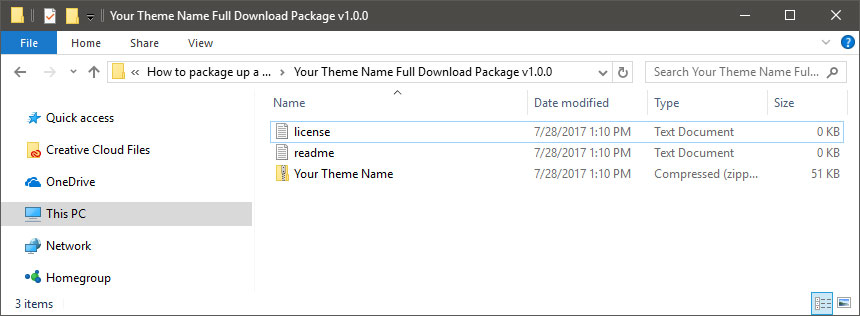
Create a new folder called Your Theme Name Full Download Package v1.0.0. Inside of that folder include your zipped up child theme that includes your stylesheet, functions files, screenshot, any other templates, and the auto-install folder with the class-tgm-plugin-activation file.
Also, every good theme includes a readme file and license information. It is good practice to include both in your theme packages. For readme inspiration visit: https://gist.github.com/zenorocha/4526327
Finalizing the package
Zip up Your Theme Name Full Download Package v1.0.0 to create the zip file that will actually be sold to customers. With this zip file, you can now list it for sale on Divi Cake or any marketplace of your choice. Even better, you are now offering your customers a one click install solution.
Hooray! You have successfully packaged up a Divi child theme for sale!
Go ahead and test it out for yourself. Try out the one click install and the content import. Let us know in the comments how it all worked out.
Ending Thoughts
Packaging up a Divi child theme for sale is a tedious and lengthy task. There are a lot of steps involved and without practice, the process can be daunting. Hopefully, this guide helps you get on your way to creating, packaging, and ultimately selling Divi child themes.
We want to hear from you. Did this guide help you package up your child theme? Are there some questions you still need answered? Let us know in the comments.


Where can i find the Child them directory in de following step?
At this point you should have a zip file called something like TGM-Plugin-Activation-2.6.10-your-theme-name.zip. Go ahead and open up that zip file and locate the file called class-tgm-plugin-activation.php. In your child theme directory, create a new folder called auto-install and place the class-tgm-plugin-activation.php in it.
Hi Martine, you will need to create a child theme first. You can use our child theme generator or can read a detailed post on how to create a child theme.
https://divicake.com/divi-child-theme-generator/
https://divicake.com/blog/how-to-create-a-child-theme-for-your-divi-website/
Hi, the files from the plugins such as customizer, widgets, and content. Are these going into the child theme folder also? If so where in the folder?
Thanks. If I missed something I’m sorry.
An error of type E_PARSE was caused in line 201 of the file /home/domains/functions.php. Error message: syntax error, unexpected token “=”, expecting “)”
I get this error when I add the registered required plugin snippet.
‘=>’ is wrong use ‘ => ‘ instead
‘->’ is wrong use ‘->’ instead
I followed all steps but its not working…it upload fine. I get this message:
Installing theme from uploaded file: MMD Websites Child Theme.zip
Unpacking the package…
Installing the theme…
Theme installed successfully.
But than when i activate it i get this:
There has been a critical error on this website. Please check your site admin email inbox for instructions.