Picture a scenario where you’re looking for a chocolate cake recipe online. You come across a page called “Ultimate Fudgy Chocolate Cake,” but it lacks a tempting photo. Would you be more inclined to click on the page if there was a mouthwatering image of the delicious cake? Absolutely!
Images are powerful storytellers, grabbing attention and enriching your web content. But did you know they can also be SEO superheroes, boosting your Divi website’s ranking in search results? Yep, optimizing your images is a secret weapon for attracting more visitors and achieving that coveted top spot on Google.
However, optimizing images in Divi can feel like navigating a maze. Between choosing the right format, crafting catchy filenames, and writing effective alt text, it’s easy to feel overwhelmed. That’s where this guide comes in! We’ll break down the process into simple steps, equipping you with the knowledge and tools to transform your Divi images into SEO champions.
Image Selection and Sizing

Remember that delicious chocolate cake image? It wasn’t just about looking good; it was relevant to the content. That’s rule number one for image selection: relevance is key.
Choose images that directly connect to your content, enhancing understanding and engaging the reader. Avoid stock photos that feel generic or unrelated – search engines can tell!
Now, picture a different scenario: you click on the cake recipe, excited to see the picture, but instead, you’re greeted by a pixelated mess. Frustrating, right? That’s why sizing matters. Images should be resized to match the display dimensions on your Divi website while maintaining quality.
This ensures optimal user experience and avoids unnecessary page loading times, which search engines penalize.
The good news: Divi has your back!
- Built-in Image Resizer: When uploading an image in Divi, use the built-in resizer to adjust its dimensions to your desired size. This ensures quality stays intact while optimizing for web display.
- Responsive Settings:
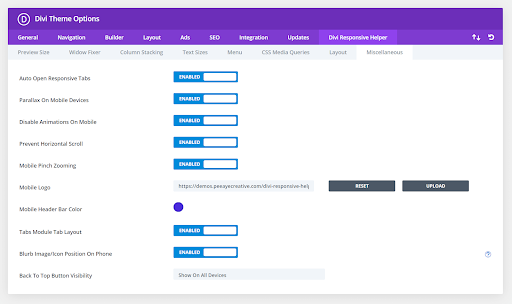
Divi enables responsive layouts, automatically adjusting element sizes across different devices. Utilize this feature to ensure your images look great on desktops, tablets, and mobiles.
Here’s a handy tip: Remember the “golden ratio” of 16:9 for landscape images and 4:3 for portrait images. These proportions are pleasing to the eye and work well across various responsive layouts.
Choosing the right file type
Think of image file formats as different choices. Each has its advantages and disadvantages. Select the one that fits your Divi images best!
The Classic Duo: JPEG vs. PNG
- JPEG (.jpg): The king of compression, JPEGs create small file sizes, perfect for photos with lots of colors and gradients. However, the compression comes at a cost – JPEGs lose quality with each save, making them unsuitable for graphics with sharp lines or text.
- PNG (.png): The transparency champion, PNGs excel at preserving intricate details and supporting transparent backgrounds. Ideal for logos, screenshots, and graphics with text. However, their larger file size can slow down your website.
The Modern Hero: WebP

Think of WebP as the latest innovation in image formats. It offers superior compression compared to JPEGs, maintaining quality while achieving even smaller file sizes. This translates to faster loading times and happier search engines (and visitors!). The only catch? WebP support isn’t universal yet, but its popularity is rapidly growing.
For Icons and Logos: The Power of SVG
Scalable Vector Graphics (SVG) is a true gem for icons and logos. SVGs are based on vector points, allowing them to be resized infinitely without losing quality. This makes them perfect for elements that need to look sharp across different screen sizes.
Remember: Choosing the right format is a balancing act. Consider your image’s content, desired quality, and website speed goals to make the best decision.
Crafting descriptive filenames
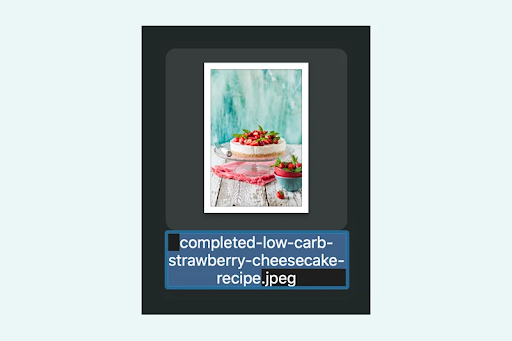
Imagine stumbling upon a dusty attic filled with boxes labeled simply “Stuff” or “More Stuff.” Not very helpful, right? The same applies to image filenames. Ditching “IMG_0012” and embracing meaningful names is crucial for both SEO and user experience.
Step away from generic names: Replace them with keywords that accurately describe your image content. This helps search engines understand what your image represents, increasing its chances of appearing in relevant search results.
Keep it concise and clear: Aim for short, descriptive names that are easy to read and understand. Think of them as mini headlines for your images. For example, instead of “DSC_4567_edited.jpg,” use “chocolate-cake-recipe-fudgy-moist.jpg.”
Divi makes it easy: Utilize Divi’s built-in filename editor when uploading images. This allows you to easily rename your files directly within Divi, saving you time and ensuring consistency.
Remember: Filenames are like first impressions for your images. Make them count by using relevant keywords and avoiding unnecessary characters like underscores or special symbols.
Image compression: shrinking without Compromising Quality
Think of your website as a car: you want it to be powerful and efficient. Large, uncompressed images act like heavy weights, slowing down your website and frustrating visitors. That’s where image compression comes in, the art of shrinking file sizes without sacrificing quality.
Tools Of The Trade
Several free and paid tools can help you compress images effectively. Here are a few popular options:
- Free: TinyPNG, Kraken.io, ImageOptim
- Paid: ShortPixel, EWWW Image Optimizer, Imagify
Finding the Balance:
While compression reduces file size, it can also affect quality. The key is finding the sweet spot between smaller size and acceptable visual quality. Most tools offer different compression levels, allowing you to adjust the balance based on your needs.
Divi Integration:
While Divi doesn’t have built-in compression, several plugins can integrate seamlessly:
- ShortPixel:
Offers automatic compression upon image upload and API integration for bulk optimization.
- EWWW Image Optimizer:
Automatically optimizes images on upload and includes lossless and lossy compression options.
- Imagify:

Integrates with Divi Builder and offers various optimization levels and automatic resizing.
Remember: Don’t go overboard with compression! Aim for a noticeable reduction in file size while maintaining quality at a level that doesn’t impact user experience.
The Power Of Alt Text
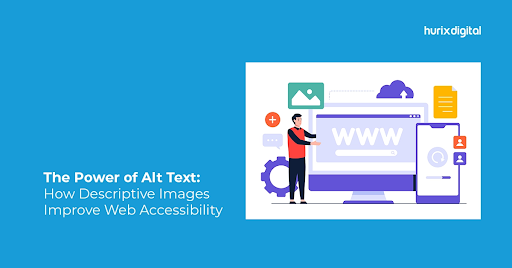
Imagine navigating a busy city blindfolded. Sounds scary, right? That’s how screen readers experience websites without alt text. This crucial element serves as a voice for your images, describing their content to visually impaired users and providing valuable information to search engines.
But alt text isn’t just about accessibility: it’s an SEO superpower! By writing informative and keyword-rich alt text, you help search engines understand your images better, potentially boosting your website’s ranking in relevant searches.
Think beyond keyword stuffing: While including relevant keywords organically is helpful, prioritize accuracy and clarity. Your alt text should genuinely describe the image, conveying its meaning and context.
Target relevant keywords naturally: Integrate relevant keywords into your alt text descriptions in a way that flows naturally. Avoid keyword stuffing, as search engines can penalize it. Remember, the primary goal is to provide genuine information.
Divi makes it easy: When adding images in Divi, locate the dedicated “Alt Text” field. This is where you’ll craft your descriptive sentences for each image.
Remember: Alt text is more than just text; it’s a bridge between your images, users, and search engines. Use it wisely to enhance accessibility, improve user experience, and boost your SEO efforts!
Optimizing For Accessibility And Readability
So far, we’ve covered the essentials of image optimization in Divi: choosing the right format, crafting meaningful filenames, and writing impactful alt text. But our journey doesn’t end there. Let’s explore additional techniques to ensure your images are not only SEO-friendly but also accessible and engaging for all users.
Descriptive Captions: Captions act as mini-essays for your images, providing additional context and details that go beyond alt text. This is especially helpful for complex visuals or those requiring further explanation. Utilize the built-in “Caption” field in Divi to add informative captions that enhance understanding for all visitors.
Title Text: Title text appears when hovering over an image. While it can offer additional information, prioritize alt text for SEO benefits. Use title text sparingly for non-essential details or humorous comments. Divi allows editing title text within the image settings.
Divi’s Built-in Features: Divi equips you with tools to ensure optimal image presentation:
- Image Adjustments: Utilize built-in adjustments like brightness, contrast, and saturation to enhance image clarity and readability.
- Focus Points: Define focal points for responsive images, ensuring important elements remain visible across different screen sizes.
- Image Hover Effects: Add subtle hover effects like grayscale or zoom for visual interest without distracting from the content.
Beyond The Basic
While we’ve mastered the foundation of image optimization in Divi, there’s a whole world of advanced techniques waiting to be explored! Consider these SEO gems to truly unleash the power of your Divi images and soar to the top of search results:
Structured Data: Revealing Deeper Meaning
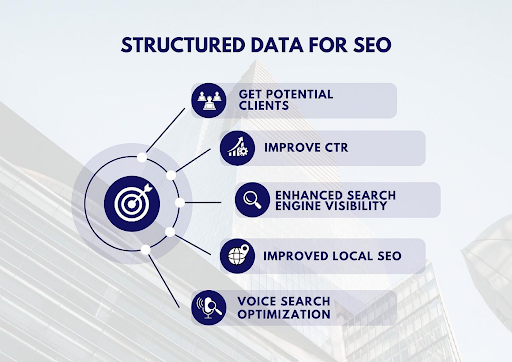
Imagine providing search engines with a detailed roadmap of your images, highlighting key information beyond words. That’s the magic of structured data! By using schema markup, you can specify the type of image (product photo, recipe image, etc.), its subject matter, and even its relationship to surrounding content.
This empowers search engines to understand your images more comprehensively, potentially leading to richer search results and increased visibility.
Divi’s Got Your Back: While Divi doesn’t have built-in schema markup tools, several plugins like “Schema App Structured Data” or “Yoast SEO” seamlessly integrate, allowing you to easily add structured data to your images and elevate your SEO game.
Lazy Loading: Speeding Up Your Site (and Impatient Visitors)
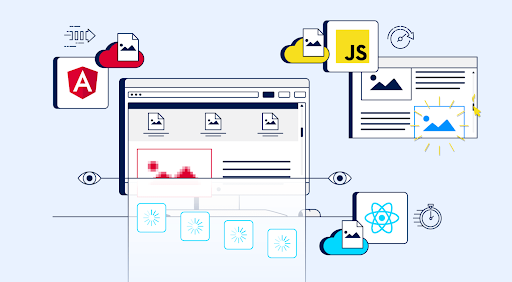
Picture a website where all images load at once, slowing things down like a car overloaded with groceries. Lazy loading addresses this issue by delaying the loading of images until they’re actually visible on the screen. This speeds up initial page load time, keeping impatient visitors happy and search engines impressed.
Divi’s Lazy Loading Options: The good news is, that Divi has built-in lazy loading functionality! Simply enable it in the Divi Theme Options to automatically delay image loading and experience the speed boost.
XML Sitemaps: Making Sure Images Get Indexed
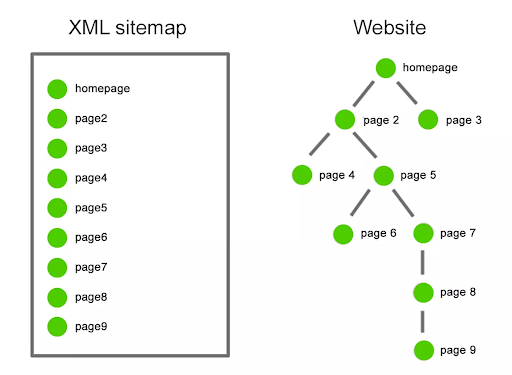
Think of your website’s sitemap as a blueprint for search engines, helping them discover and index all your content. But don’t forget your images! Include them in your XML sitemap alongside your text pages to ensure they’re properly crawled and indexed, potentially improving your image search ranking.
Divi and Sitemaps: Plugins like “Yoast SEO” or “Rank Math SEO” often include sitemap generation features, allowing you to easily include your Divi images alongside your regular pages for comprehensive indexing.
Conclusion
Mastering image SEO in Divi unlocks a hidden weapon: attracting visitors and conquering search results. This guide equipped you with the tools and knowledge to transform your images into SEO champions.
Remember:
- Relevance is key: Choose images that connect with your content.
- Balance quality & size: Compress strategically without sacrificing visuals.
- Keywords matter: Use them naturally in filenames, alt text, and captions.
- Think accessibility: Provide clear descriptions for every one.
- Explore advanced techniques: Level up your SEO with structured data and more.
By consistently applying these strategies, your Divi images will work their magic, propelling your website to SEO victory!





0 Comments