D Community is a child theme for Divi that combines several plugins including BuddyPress, the premium version of Youzer, MyCred, and WooCommerce with Divi to create a stand-alone social media platform. The child theme includes the features you’d expect to see on any social media platform. In this article, we’ll take a look at D Community to help you decide if it’s right for your needs.
Installing D Community
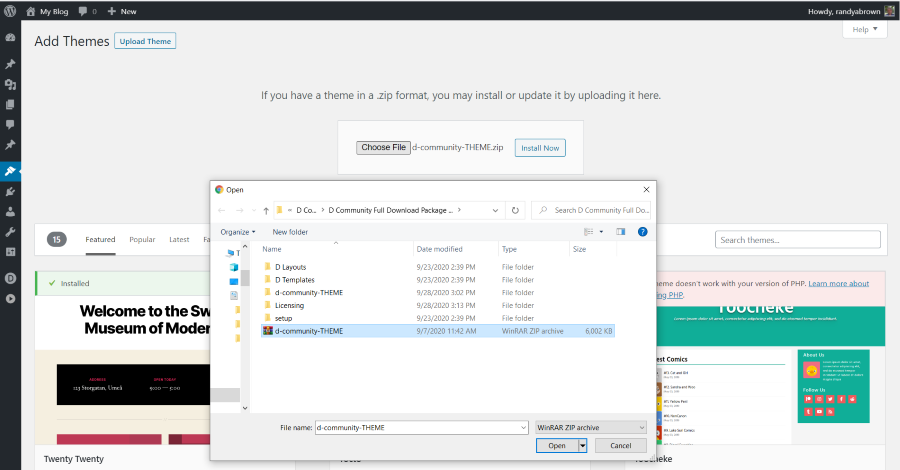
Installation is done manually, which is to be expected when you consider that we’re not just adding a child theme. We’re building a social network platform. It’s not that difficult, but it does take several steps and they have to be done in a certain order. Here’s the process I followed. Unzip the download file. Upload the file the same as any theme and activate it.
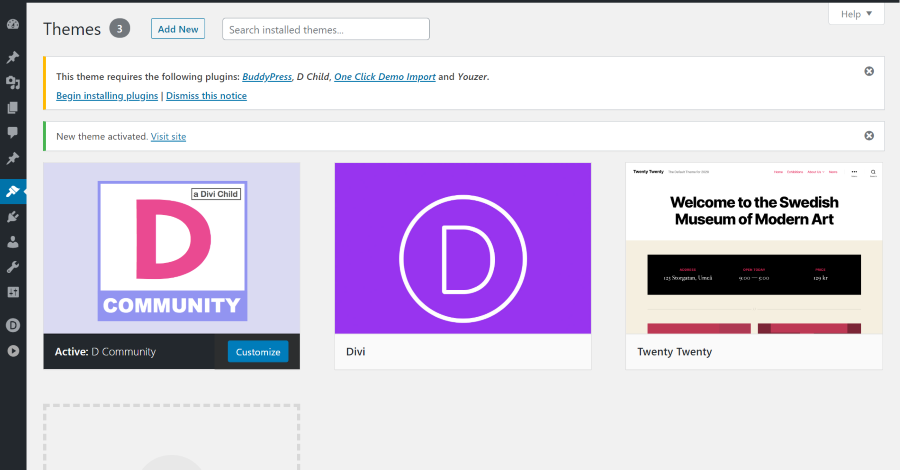
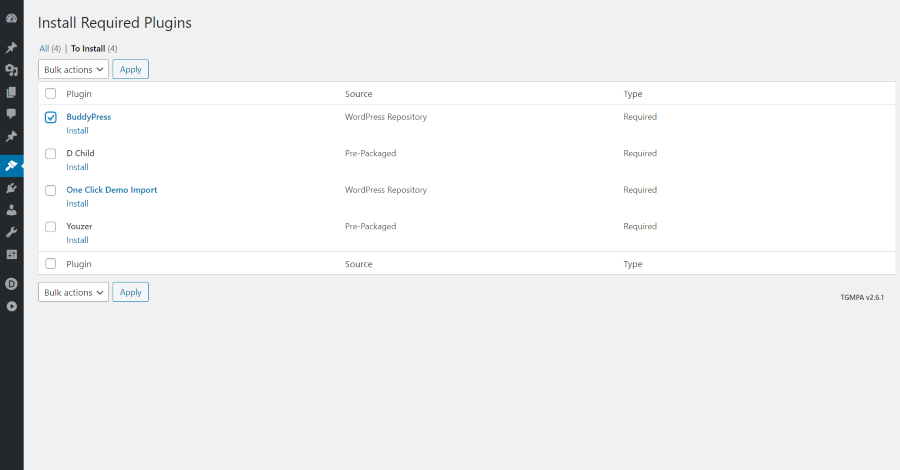
Once the theme is activated you’ll see a message that shows plugins that are required for the theme. Select Begin Installing Plugins. This message doesn’t warn you to install in a certain order.
Don’t choose all of the plugins and install them. Instead, install them one at a time in this order:
- BuddyPress
- Youzer
- D Child
- One Click Demo Import
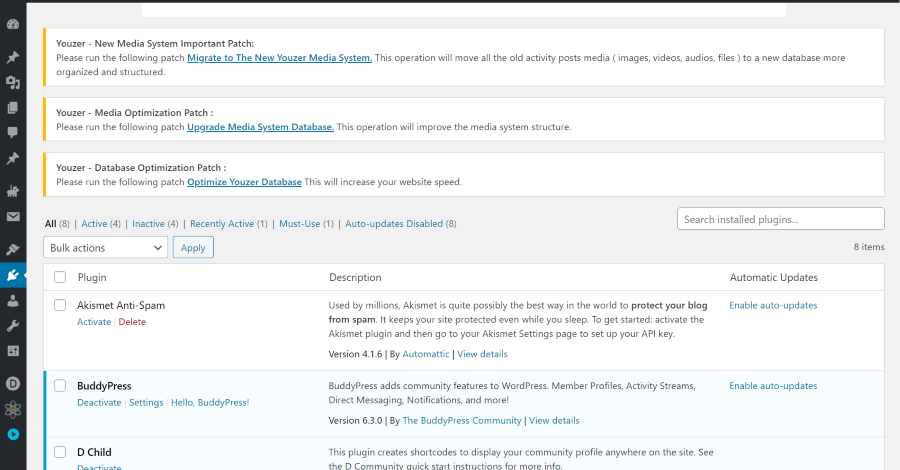
Perform any updates the plugins ask for. Youser adds several large panels to every list page on the backend, such as plugins, the Divi library, etc. They include a button to delete each notice. I recommend deleted all of them to keep from scrolling down every page to get to the content.
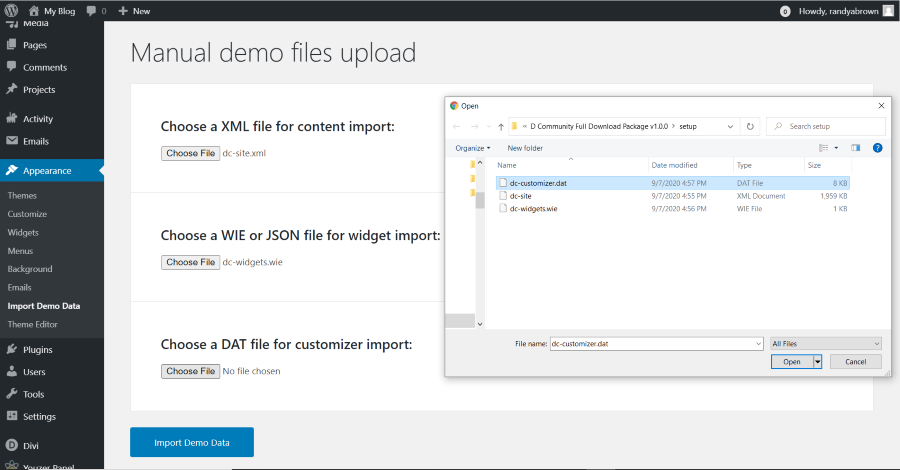
Go to Appearance > Import Demo Data. Here, you’ll manually upload the files. Select to choose the files one at a time. You’ll find them in the unzipped download folder within the Setup folder. Select Import Data and wait for it to complete.
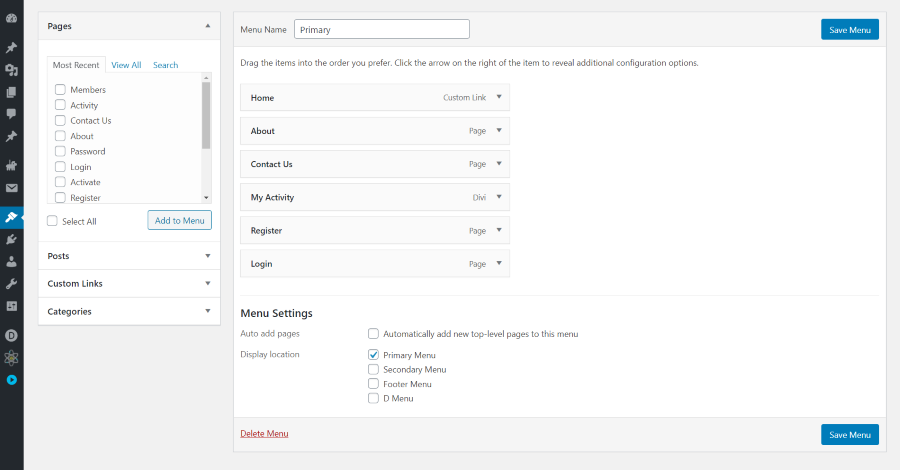
It did set up the menu for both primary and D Menu, but I needed to assign them. It includes instructions on using Font Awesome icons in the menu. They look great on the demo, but I decided to skip this extra step for the review.
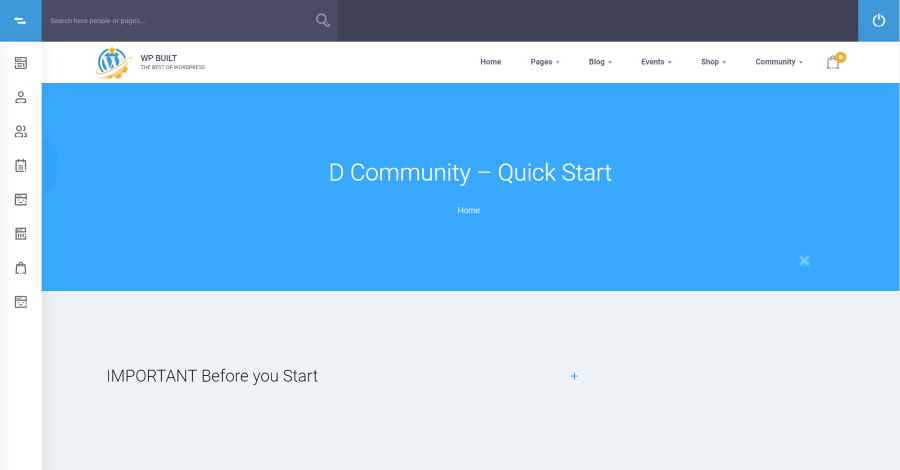
You’ll also need to set up permalinks, BuddyPress, and Youser. They’re important for login, registration, and other pages. The Quick Start guide provides a step-by-step walkthrough that gets you started quickly. It includes both video and written content. The guide also includes a link to the shortcodes you can add to your Divi layouts.
After Setup
Once you get it set up, users have options like other social platforms. Share posts, see live notifications, comment with GIFs, and add tabs, links, custom private profiles, and more. Create groups, follow users, connect as friends, send private messages, etc. It includes over 700 options, so you have full control over your social network.
The focus isn’t on pages and intricate layout design, although it has several pages. Rather than the standard pages that most Divi child themes have, these pages are specific to social community needs and are built with the Divi theme builder. Let’s take a closer look at the pages.
Creating D Community Pages
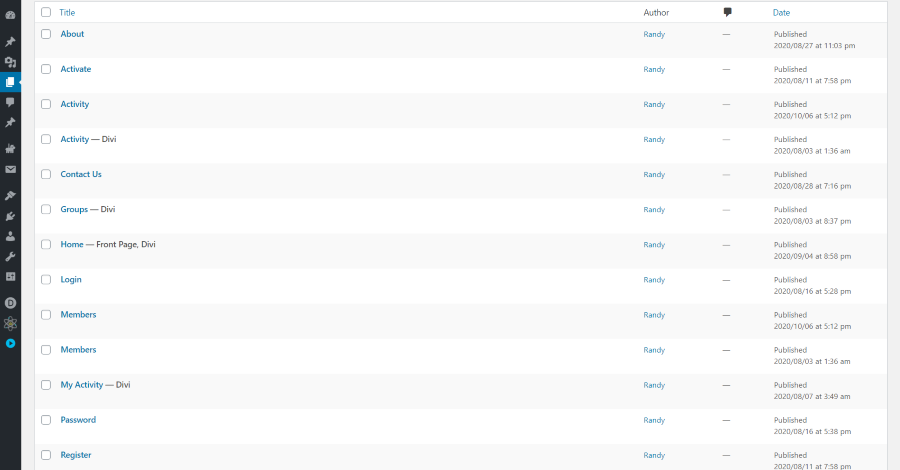
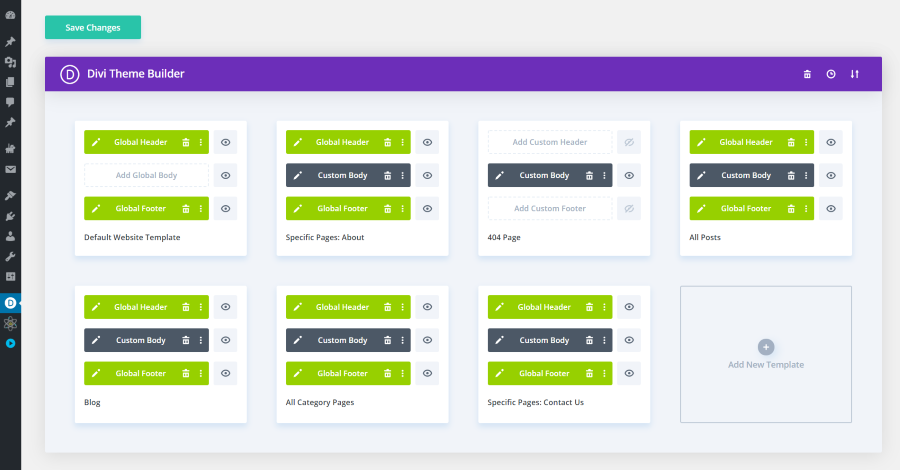
The child theme creates 11 new pages and a plugin creates 2. Most are empty, so you’ll need to import their layouts into the Theme Builder to build them.
Importing all of the templates into the Theme Builder gives you a default layout, an about page layout, 404 page, posts, blog, category pages, and a contact us page. The pages contain shortcodes and CSS that’s already added for you. Shortcodes includes those from the D Child plugin, Youser, and BuddyPress.
Header and Home Page
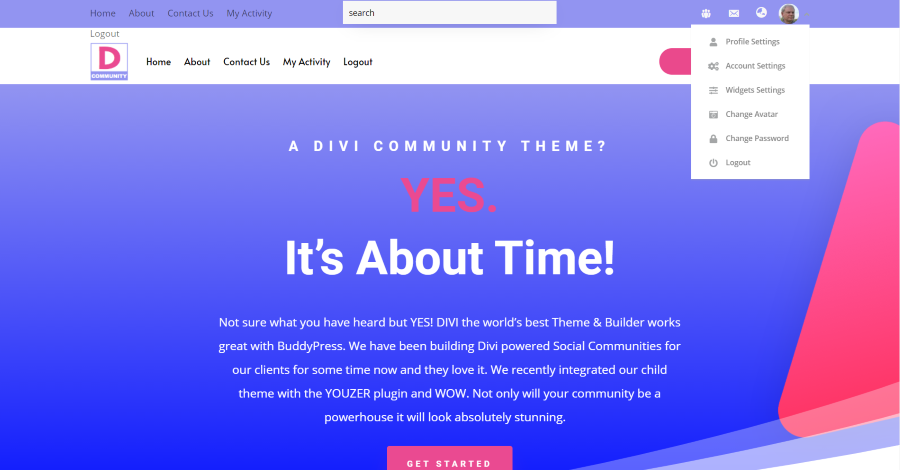
This applies a new header and footer to the main pages. The Home page displays a hero section with a call to action over a background with a shape, a couple of 2-column CTAs, an embed video, testimonials, an email signup form, and more. The example above shows the D Child shortcode adding a dropdown menu to the secondary menu. I can now add my design.
About Page
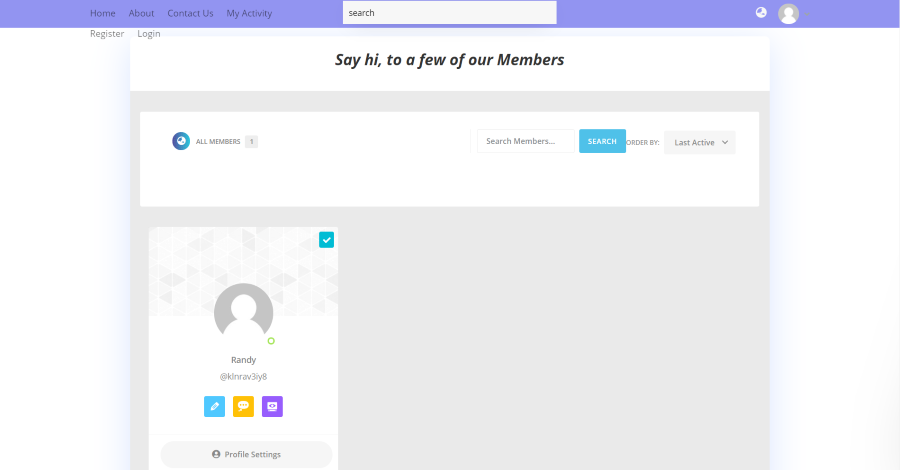
The About page displays the hero section with the page title, a 2-column section with information about the company, and a section with cards for a few of the members. Here, users can search for members.
Registration Page
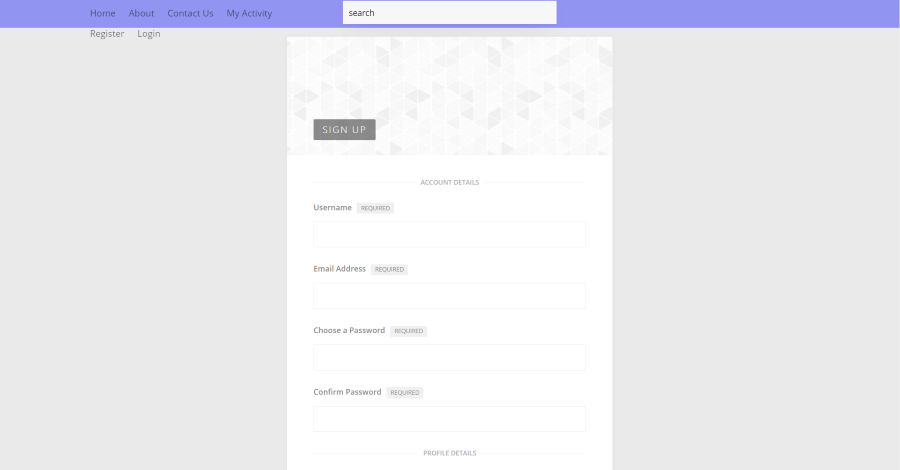
The registration page is controlled by BuddyPress. It provides a form where users can join your website. It works exactly as expected.
Login Page
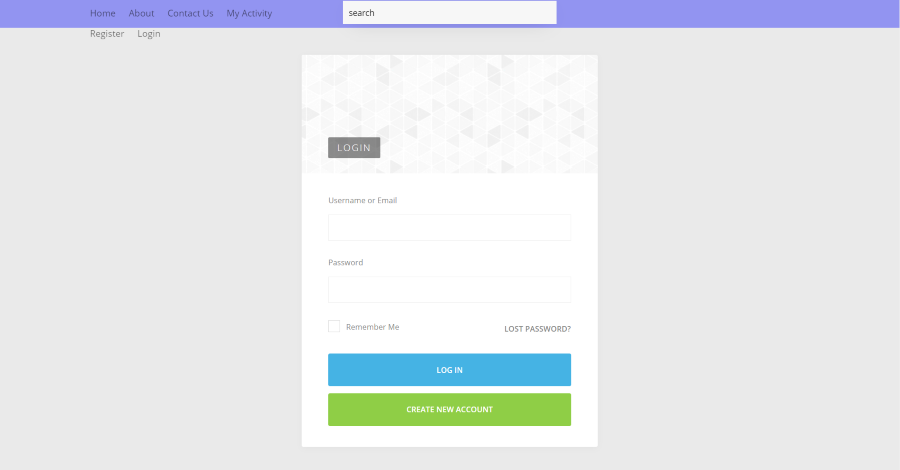
Once users register, they can then login as normal. The login page now has new styling, which looks more elegant than the standard WordPress login screen.
Profile Pages
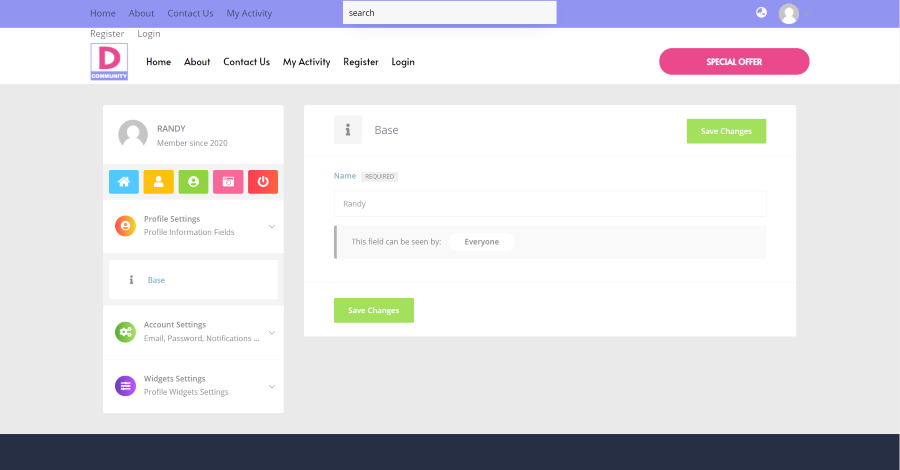
Each member has access to their profile page where they can set up their information, see which plan they’re subscribed to, and choose the widgets they’d like to use.
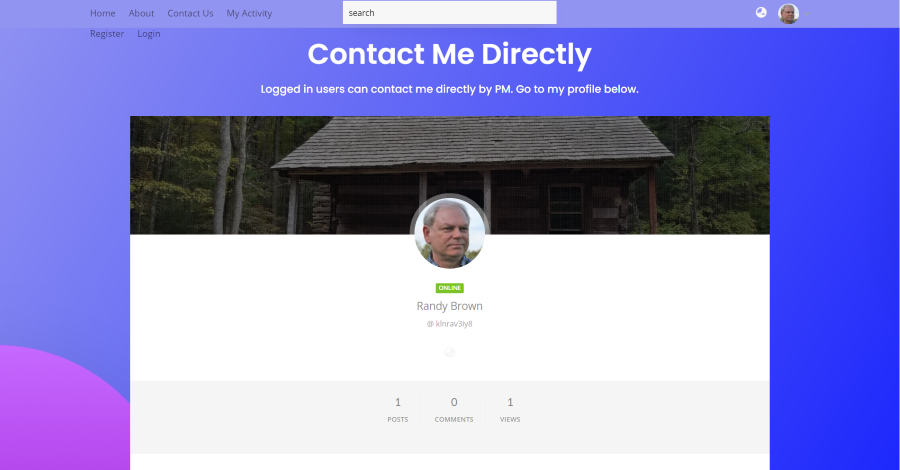
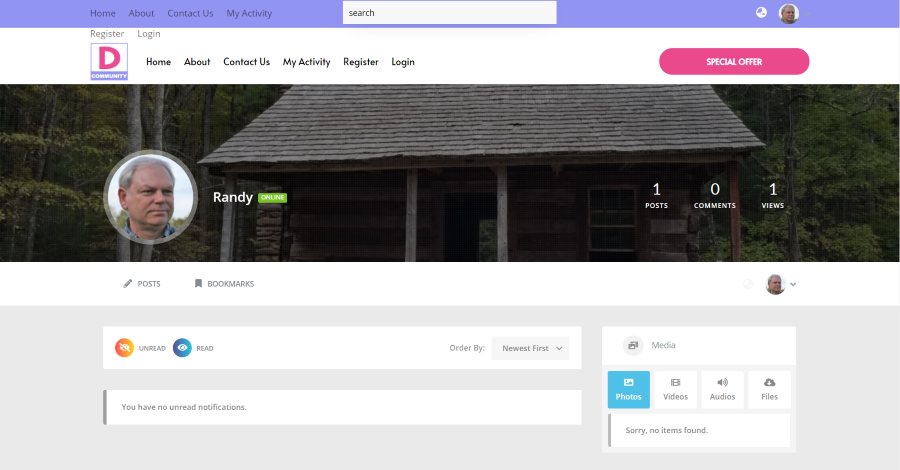
Users can add an avatar, background image, their own images, videos, etc. In this example, I’ve added my avatar and background. It shows if the user is online, the person’s name, username, the number of posts, comments, and views.
My Activity Page
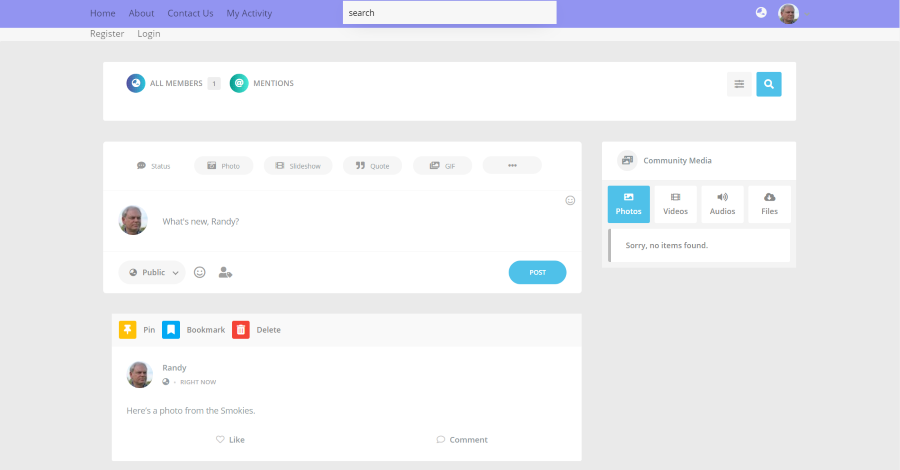
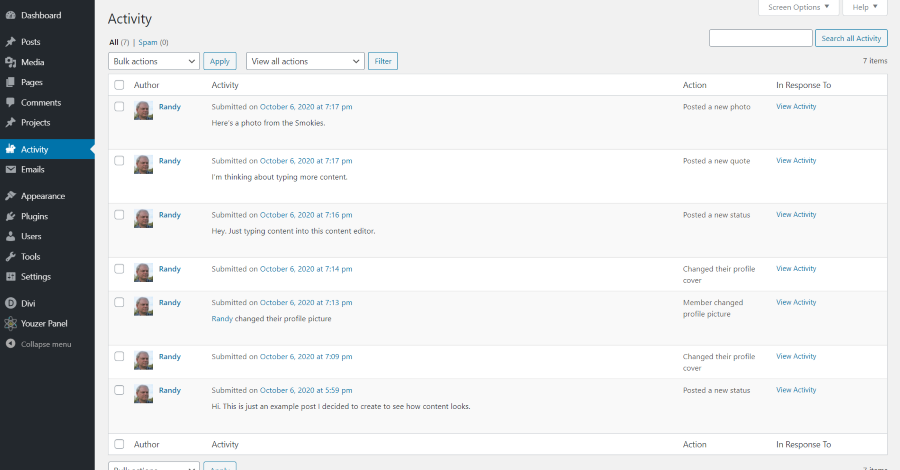
The My Activity page includes a hero section to introduce the page, the shortcode for BuddyPress, and a form for your email list. This shows the BuddyPress content. It provides an area where the user can see their activities and content they’ve posted. This is very much like a Facebook wall and looks great as a social platform.
It includes an area to see all members and mentions, an editor to create content, and a widget to see community media. For content, users can add text, photos, a slideshow, quote, GIF, file, video, audio, and a link. The Youser widget for community media is added to the Wall sidebar.
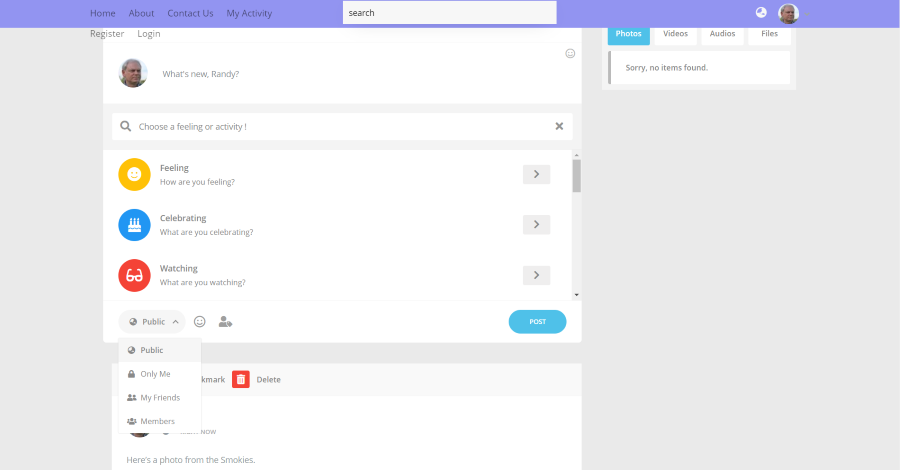
They can also choose who can see the post. Options include make it public, only for them, their friends, and for members. A feeling or activity lets them select between 12 different options including eating, drinking, traveling, listening, thinking, reading, etc. This adds to the social experience and sets it apart from Facebook and other platforms. Users can like and comment on posts.
Clicking on the globe in the upper right opens your notifications screen. This shows your background and avatar along with the read and unread posts. You can also see bookmarks.
D Community Admin
As an admin, you have access to and control of all of the activity on the platform. This means you can keep your network in line with your goals.
D Community Documentation
Documentation is provided on the publisher’s website. It includes a quick start guide that walks you through the setup. The documentation is easy to follow and includes both text and video.
D Community Purchase Options
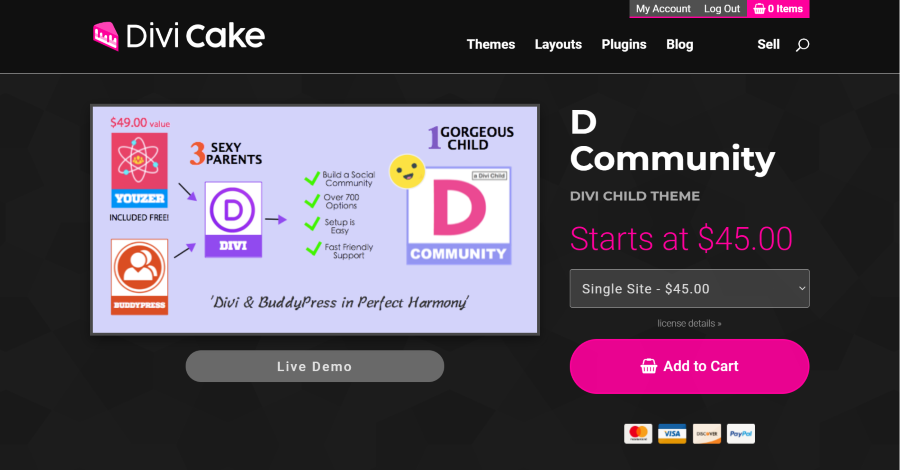
D Community is available in the Divi Cake shop and includes several pricing structures so you can purchase according to your needs.
- Single Site – $45
- Unlimited Sites – $99
Ending Thoughts
D Community is a very do-it-yourself child theme, but everything you need is included and it isn’t difficult to import content. You don’t have to create the pages manually, but you do need to be familiar with using the Divi Theme Builder. The pages are automatically created once you import the templates into the Theme Builder.
D Community doesn’t have the vast amount of features you’d see on platforms like Facebook. So, rather than building a global platform for billions of users, D Community with Divi and WordPress would be a great choice and well-suited for a specialized platform for a specific community. Examples include a platform for your church, sports team, hobbies, etc.
My examples are simplified because I didn’t take the time to build a community for this article, but you can see that it would look like a professional network. I like that it runs in WordPress and it can be added to your website if you’re not already depending on a child theme for your design. If you are running a child theme, then you can still use D Community on a subdomain.
There is a lot here for the money and D Community is easy to recommend to anyone wanting to build a social network with Divi .
We want to hear from you. Have you built a social media network with D Community child theme for Divi? Let us know about your experience in the comments below.







0 Comments