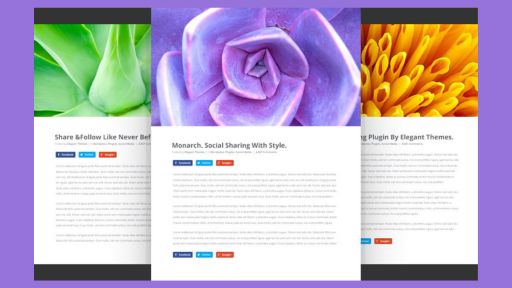
Have you ever heard of ‘Monarch’? No. I’m not talking about the British Monarch. I’m talking about the Monarch plugin: a social sharing plugin by Divi, included with your Elegant Themes membership.

Introduction to the Monarch Plugin
Today, businesses understand the power of social media more than ever. Make content sharing easy for your audience, and your engagement rate will soar, the conversion rate will boost, and you’ll win loyal audiences, inviting in their friends. Thanks to the Monarch plugin, it’s now possible to integrate social network icons seamlessly on your website so sharing becomes a one-click experience. Monarch plugin offers 8 placement options each with its own respective settings, making it Divi’s fast-growing plugin.
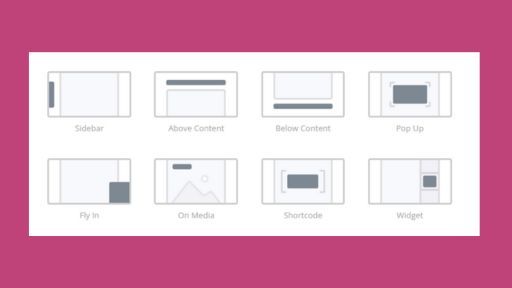
Explore Monarch’s 8 Social Locations
In this post, I’ll explain how the Monarch plugin works and how to enable social networking icons in a few steps. You’ll learn to get full control over the style and behavior of your social sharing buttons, making the setup experience enjoyable.
Step by Step: Getting started with the Monarch plugin in Divi
First things first, you need to be a part of Elegant Themes Membership. So what’re you waiting for? Click here to become a member, and you’ll get access to the Monarch plugin, Bloom, and many other features that come with it.
The Monarch plugin boosts easy integration and lets you dictate the look and functionality of your social icons in the custom panel, known as the Monarch Dashboard. To access that, you first have to download and install the plugin. For that, head over to the member’s area in your Elegant Theme account and log in to install the plugin. The next step is to upload the downloaded zip file to the WordPress dashboard. And don’t forget to activate the plugin.
Once you’ve activated the Monarch plugin, you’ll find its custom panel in the WordPress dashboard to access all the settings easily.
Monarch’s Custom Settings
Social Sharing
Whether you’re launching a blog or running a business, allowing social sharing on your website is one thing you should be focused on. Monarch plugin allows your visitors to share your content on their socials with a click of a button. It caters to the needs of different pages on your website, considering the unique needs of every page. Not only it has a positive impact on the SEO of your website but it also empowers your visitors to feel connected with your brand and endorse your content by sharing on social profiles.
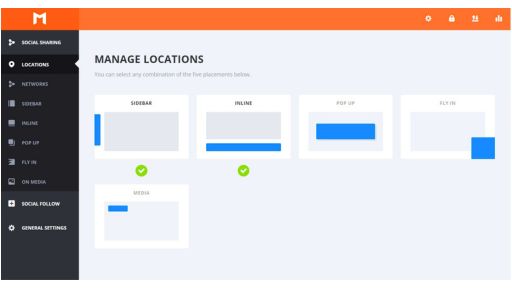
Whether it’s the unique placement of the social icons or different social icons themselves that your website requires, Monarch offers 5 distinct sharing locations, each with its own display settings. Let’s take a look at each of them.
Read More: Learn about the best SEO plugins for improved ranking
Location Tab
To access different sharing locations, go to ‘tools’ in your WordPress dashboard. In the tools, you’ll find ‘Monarch Settings’.
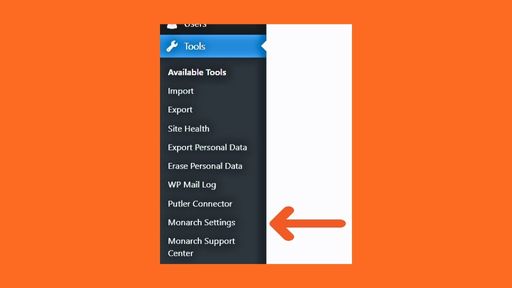
Monarch Settings in the WordPress Dashboard
Simply click on that. Select the Locations tab on the left sidebar. Here you’ll find 5 different placement areas. You can use them individually or mix and combine more than one placement. Below I’m going to show you how to make the best use of each of the placements, their unique sides, and how they’re useful.
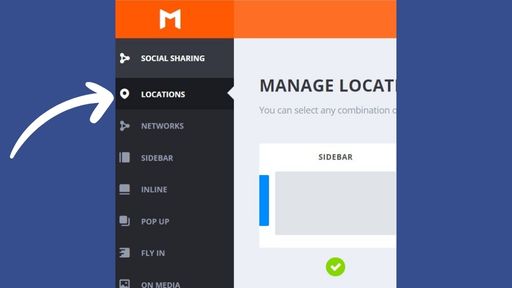
Access the Locations Tab for the Placements
Floating Sidebar
The Floating Sidebar is an effective method to showcase your social sharing icons on your website. While the floating sidebar has always been popular due to its accessibility, Monarch has simplified its integration even further.
Divi provides 5 elegant hover design options within this plugin, along with custom settings for the sidebar network icons. Furthermore, the floating sidebar remains consistently visible on your webpage, enabling visitors to share your content at any point while scrolling through the page.
Moreover, the design of the floating sidebar has been crafted with mobile responsiveness in mind. Whether on a tablet or a mobile phone, the floating sidebar remains responsive across all devices, guaranteeing an enhanced user experience.

Monarch’s Mobile-Ready Floating Sidebar
Read More: The process of optimizing your Divi website for speed
Inline Sharing Links
The Monarch plugin offers two inline sharing options: “Above Content” and “Below Content.” The “Above Content” option allows you to display social network icons at the top of the page, just below the title.
In contrast, the “Below Content” option enables you to present the social sharing icons at the end of the content, so when readers finish your post, they have the option to share it on social media. However, if your webpage requires a sharing option at the very top, use the “Above Content” feature.
Thanks to Monarch’s advanced functionality, it automatically detects the beginning and ending points of your post, positioning your social icons accordingly. All you need to do is enable the settings from the Locations tab, and you’re set.
Designed for blog posts and content-heavy websites, you can enable both “Above Content” and “Below Content” simultaneously, facilitating instantaneous sharing at both the top and the bottom of your page.
Inline Sharing: Before and After Content
Media Sharing: On Images & Videos
When your website is image-heavy, Monarch makes it easy for users to share those images. You just add images as usual, and as long as “Media Sharing” is enabled from the dashboard, social icons will appear without any additional steps required.
Monarch automatically detects all the images in your blog post and overlays social icons on each image that fade in upon hovering. This approach ensures that images remain visually appealing without social icons obstructing the view, but they become visible when you hover over the picture, facilitating quick sharing.
However, there may be times when you want to add social icons only to a select few images on your webpage. Fortunately, it lets you enable social buttons on specific images using a Media Sharing Shortcode, ensuring a cleaner user experience.

Effortless Social Sharing on Images
Read More: Here is a list of free graphic design tools you should know
Social Sharing Triggered Pop-Ups
As the name suggests, social sharing pop-ups are triggered pop-ups that appear after a set time delay. Growing increasingly popular, Monarch allows you to create automatic sharing pop-ups that are not only straightforward to set up but also avoid immediately disrupting your reader with a pop-up. The delay is also beneficial for allowing the website to load first and then triggering the pop-up, ensuring a swift loading speed.
It comes with 6 different trigger options as well as letting you fully customize your pop-up title and message. Moreover, it gives you complete control as to how and when they are displayed to your visitors.
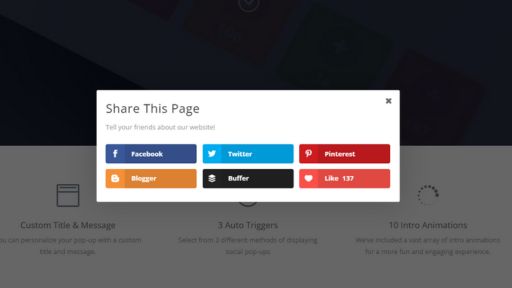
Monarch’s Automatic Sharing Pop-up
Automatic Fly-Ins
Similar to triggered pop-ups, fly-ins are an excellent method to draw your reader’s interest at peak engagement moments. Monarch provides custom trigger settings for fly-ins, enabling you to display them in the bottom right or bottom left corners of users’ screens. Furthermore, it offers over 10 animations, enhancing the fly-in experience to be more interactive and engaging.
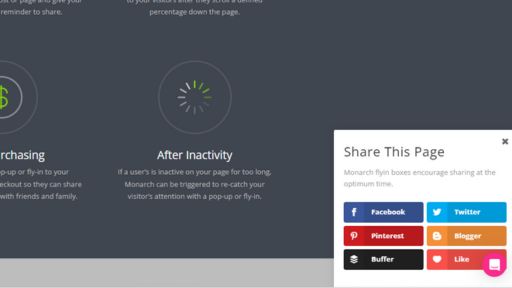
Monarch’s Custom Automatic Fly-in Tool
While discussing triggers, let’s delve into the options Monarch offers with automatic pop-ups and fly-in triggers.
Automatic Triggers for Pop-ups and Fly-ins
Automatic Triggers for Pop-ups and Fly-ins are helpful to keep your audience involved by capturing their attention when they are most engaged or when they are considering leaving your page. Both Pop-ups and Fly-ins offer the same trigger options.
In the Pop-up or Fly-in tab, scroll down to the Display Settings. There, you’ll find all the trigger options. The Monarch plugin offers 6 triggers. Trigger After Time Delay, Trigger After Inactivity, Trigger At The Bottom Of Post, Trigger After Commenting, Trigger After Scrolling, Trigger After Purchasing. Each of these triggers can either be used individually or in combination. Let’s dive deeper into each option.
Why Triggers are Needed
Your readers are finding ways to leave your website, especially if it disrupts their viewing of your content. Thus, when a popup or a fly-in appears all of a sudden, users might leave your website without giving it a second thought. This is where triggers come into play.
A trigger is an event that activates when a specified time limit is reached. It’s important to let your users enjoy smooth interaction with your site without anything blocking their way. Set the trigger to activate pop-ups once they have spent a specific amount of time on your website, enhancing their experience and increasing the chance of engagement.
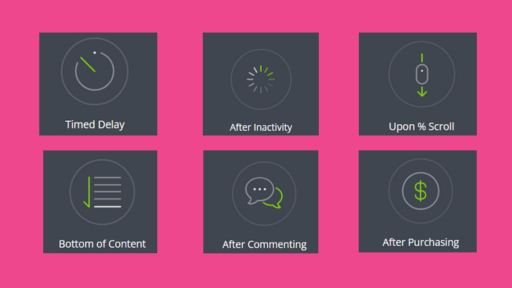
Monarch Plugin’s Popup and Fly-in Triggers
Trigger After Time Delay
Trigger After Time Delay gets fired when a user interacts with your page, initiating a countdown. Once this countdown reaches the predetermined delay value, the popup will appear. For example, if you’ve set the delay to 8 seconds for “Trigger After Time Delay”, the popup will emerge 8 seconds after a user begins interacting with your content on the page.
Trigger After Inactivity
The ‘Trigger After Inactivity’ popup shows up only when the user sits idle for a specified period of time. It’s designed to recapture users’ attention if they become distracted after interacting with your page. This trigger functions similarly to “Trigger After Time Delay”, but instead of a fixed countdown, it monitors user inactivity. If a user remains inactive on your page for the set duration, the “Trigger After Inactivity” popup emerges to re-engage them. Set the idle timeout in seconds depending on how long the length of inactivity lasts before the pop-up activates.
Trigger At The Bottom Of Post
This triggering is more targeted, appearing only to those who are your engaged users. It becomes visible to regular readers or those who read your entire post, and thus, are more likely to share your content on their social media. Another advantage of this trigger is that it helps filter out the annoying users that only appear to spam your website.
Additionally, you won’t disrupt visitors during the reading with popups blocking their view until they reach the bottom. This means it may target a small audience, but those targeted will be more inclined to share your posts, potentially leading to higher conversions.
Trigger After Commenting
Trigger after commenting functions similarly to ‘Trigger At The Bottom Of Post’, except it goes a step further. It displays to users who not only read your post to the end but also took the effort to comment. This means they’re more engaged, having shared their opinion on your post, and are likely more inclined to share the post on their social networks. This makes Trigger After Commenting a high-conversional trigger.
For instance, if a user leaves a comment on your post, the popup will appear to them as soon as the page reloads.
Trigger After Scrolling
Sometimes, there’s a specific point in your content that you believe your reader might want to share. This is where “Trigger After Scrolling” comes in handy. The popup is triggered based on a set percentage. Once you enable the “Trigger After Scrolling” option, you can choose the percentage of the page at which the popup will appear. It could be at the beginning, middle, end, or any point where you think it’s optimal to engage the reader.
For example, after enabling “Trigger After Scrolling”, if you set the “Percentage Down The Page” to 80, the popup will appear once the reader has scrolled 80% of the way down the page. This feature ensures that the popup is displayed at just the right moment to encourage sharing.
Trigger After Purchasing
Trigger After Purchasing” is an excellent way to target visitors who convert. Yes, you read that right. “Trigger After Purchasing” is designed for e-commerce websites and activates once a customer completes a purchase, often accompanying a thank-you note. This provides an opportunity for your newly converted customers to share your brand with their friends.
Another advantage of enabling “Trigger After Purchasing” is that it not only helps you identify your loyal customer base but also aids in re-engaging your less active visitors.
Social Following
Social Media Follow is a module that is rarely missing from any page on any website. It’s one of the main ways to connect your website with your social media channels. Monarch plugin has made showing your social network profiles, and letting your visitors turn into followers easy as pie. All you need to do is enter the URLs of your social handles, and it automatically displays your social network on your website.
Monarch plugin offers over 30 social profiles and networks to choose from, making it an unparalleled choice for online interaction.
Place Follow Buttons in any Widget Area
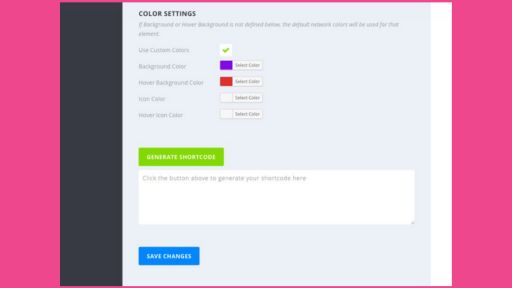
Monarch plugin allows you to display social follow buttons anywhere on your website by creating a customized shortcode. For example, you can incorporate the shortcode in your Divi theme’s text module as well as in the shortcode tab in the Dashboard. Go to Monarch Settings. In the SOCIAL FOLLOW tab, click on SHORTCODE.

Monarch’s Custom Social Follow Shortcode
Scroll past the display and color settings, and you’ll find GENERATE SHORTCODE. Enter the shortcode and you’re good to go.
Integrate Monarch’s Social Buttons Easily
Using shortcodes, you can design and customize a footer widget, sidebar widget, or even inline follow links anywhere using the Monarch plugin, boosting your followers big-time.
Read More: Take a look at 10 creative Divi footer designs for inspiration
Share and Follow Counts
Nowadays, people demand transparency when it comes to engaging with the brand. So, keeping a transparent relationship with your visitors is paramount. The Monarch plugin allows you to showcase share count, either alongside your network names or on their own.
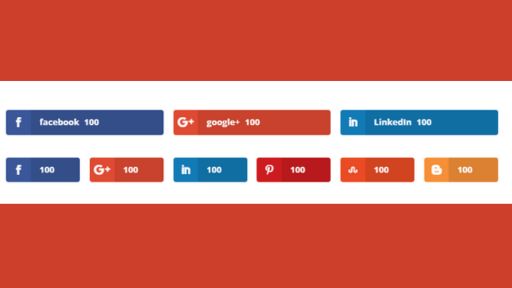
Display Share Stats with Monarch Plugin
Similarly, you can display a follow count for your social profiles on any given page, combined or individually. Using this plugin, you get full control over selecting which social networks to display and their respective counts. You can either manually enter your social media follow numbers or you can connect to the network APIs to pull follow counts dynamically.

Showcase Live Social Media Counts
The Monarch Dashboard
Monarch plugin gives you comprehensive control over every setting via the Monarch Dashboard. While dealing with plugins can sometimes be intimidating, it’s not the case with Monarch plugin. From complete customization and configuring display settings to having an overview of your Monarch statistics and importing and exporting your Monarch data, the Monarch Dashboard is a one-stop shop for all your configurations. Let’s explore the options that this plugin brings to the table.
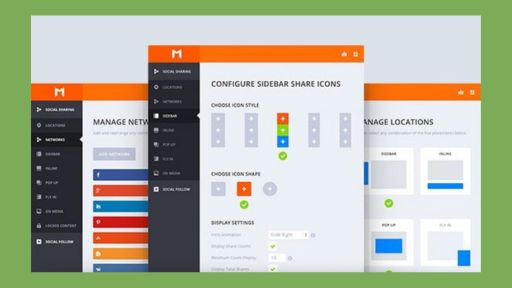
Monarch Dashboard: From stat to settings
Add or Remove Spacing Between Icons
Monarch plugin gives you the freedom to decide how your social icons should appear. you can accommodate up to six social icons in a single row. From the dashboard, you can adjust the spacing between these icons as needed or you can let them take on an auto-width.
Adjustable Icon Layout in Monarch
Furthermore, you have the option to eliminate all spacing for a whole new look.
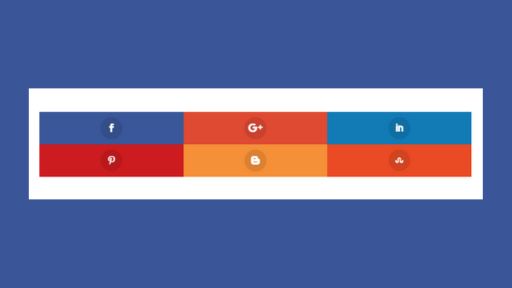
Zero-Spacing Social Icons Display
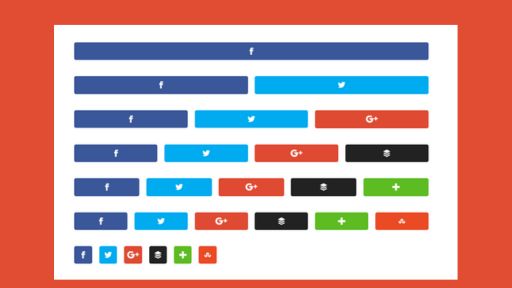
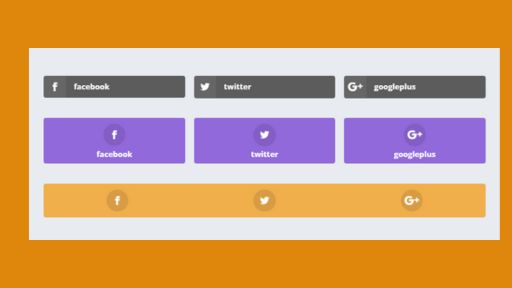
A dive into Monarch’s Icon Shapes
In the Monarch Dashboard, you’ll find 3 distinct shapes: squared, rounded, and circular. Whether you’re aiming for a sharp, modern look with squared icons, a softer touch with rounded edges, or a sleek, minimalist feel with circular icons, this plugin caters to your design preferences. Choose any style that complements your website’s design to make it stand out.

Monarch: Three Button Shapes via Monarch Dashboard
Pick Your Color
Monarch gives you full control over the colors of your buttons and their content. However, people tend to recognize social media icons more quickly by their default colors. Therefore by default, Monarch displays standard icon colors. For a more custom appearance, go to Color Settings past the display settings, and customize the colors to your preference.
Monarch: Standard and Personalized Pallets
Configure Display Settings
The Monarch plugin goes beyond just the basic settings. It lets you have more personalized configurations in the Monarch Dashboard to fit your every need. From enabling Display Share Counts, and Display ‘All Networks’ Button to opting to Hide On Mobile Devices, the choice is yours. After all, Divi is passionate about giving you the experience of your lifetime with every product they come out with – and the Monarch plugin is no exception.
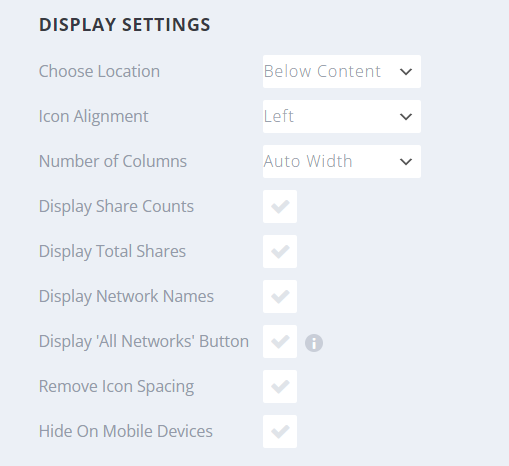
Enhanced Personalization with Monarch Plugin
Manage Social Networks
Whether you prefer to display social icons in a specific order or pick from the 40+ social network options Monarch offers, the Monarch plugin simplifies the process for you. Simply go to the SOCIAL SHARING or SOCIAL FOLLOW tab, Click on NETWORKS, select the social networks of your choice, and add labels and URLs to initiate. Additionally, you can easily drag and drop to rearrange the order of the networks.
Check You Monarch Statistics
You can check your share and follow stats anytime from the Monarch Dashboard. Head over to the stats icon located in the upper right corner of the screen. There, you’ll find the Follow Activity, Total likes, and Total Shares as well as your individual network statistics sorted by day, week, month, and year. A great way to analyze how well the integration of buttons in various locations on your website is performing, enabling you to make informed decisions to further enhance your results.
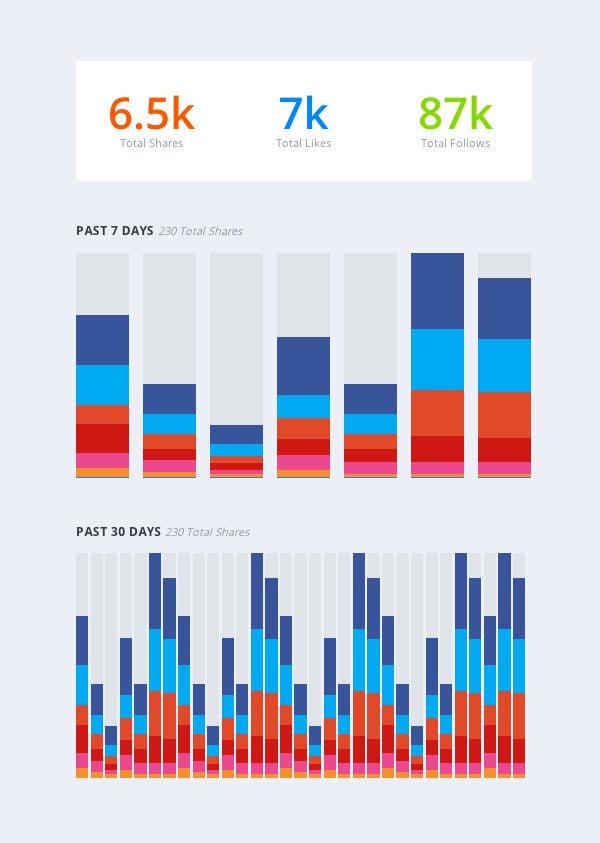
Monarch’s Insightful Share and Follow Stats
Monarch’s Import Export Cross-Site Integration
If you’ve multiple sites and wish to use the same Monarch configurations across them all, the Import/Export feature serves you in all its mighty. Using the Monarch plugin, it is very easy to import and export Monarch settings from one WordPress site to another.
Open Monarch Settings of the site you want to export. Click on the arrow sign in the upper right corner of the screen. Click on the Export button. A JSON file with your Monarch Settings will be generated. Save this file to your computer.
Now, go to the Monarch Setigns of the site you wish to import the downloaded JAOSN fickle. In the Monarch Settings, this time click on the Import option. Select the previously saved JSON file from your computer. Click on the Import button. The same settings for your Monarch plugin are now ready to use.
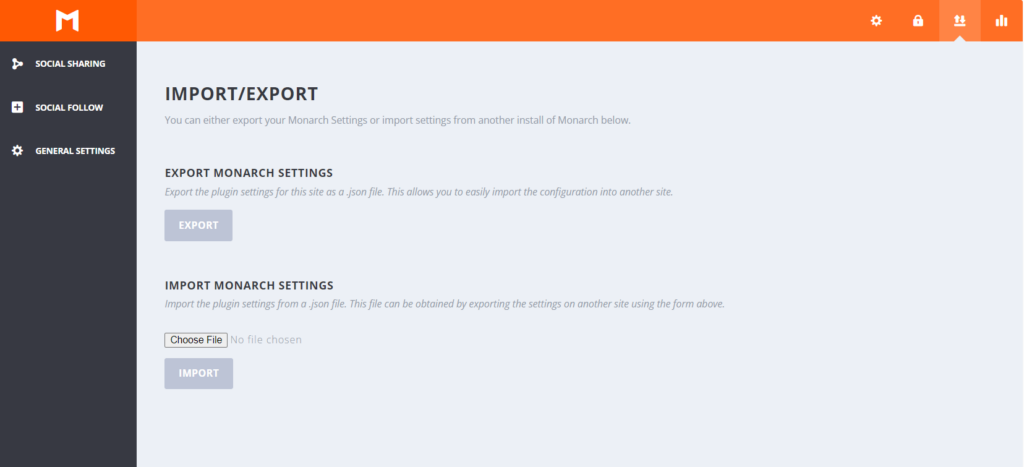
Transferring Monarch Settings: Step-by-Step
Conclusion
In general, Divi designed the Monarch plugin to simplify social sharing and following, aiming for optimal outreach with improved design. Their ultimate goal is to leverage social media as a positive force for your business. Therefore, in pursuit of increased sharing, it’s important not to overwhelm your visitors by cluttering your website with possibly every social link. It’s encouraged to choose and display only the social networks where you’re most active and where the likelihood of engagement is high.
Ultimately, it’s reassuring to have an all-in-one social plugin without the need for coding. This plugin integrates seamlessly with WordPress, allowing easy customization to suit your website’s aesthetics. Use the Monarch Dashboard to style your social buttons, place them anywhere on your website, and achieve a truly personalized experience.
Have you tried Divi’s Monarch plugin yet?


0 Comments