The Divi Theme Builder is the update that Divi users have been waiting for. This is a new Divi feature that makes it easy to create headers, footers, and page layouts and apply them to any page or post type. Even though it uses the Divi Builder system, it’s different from the Divi Builder in that it focuses on site-wide templates. In this article, we’ll take a close look at the Theme Builder and see what it can do.
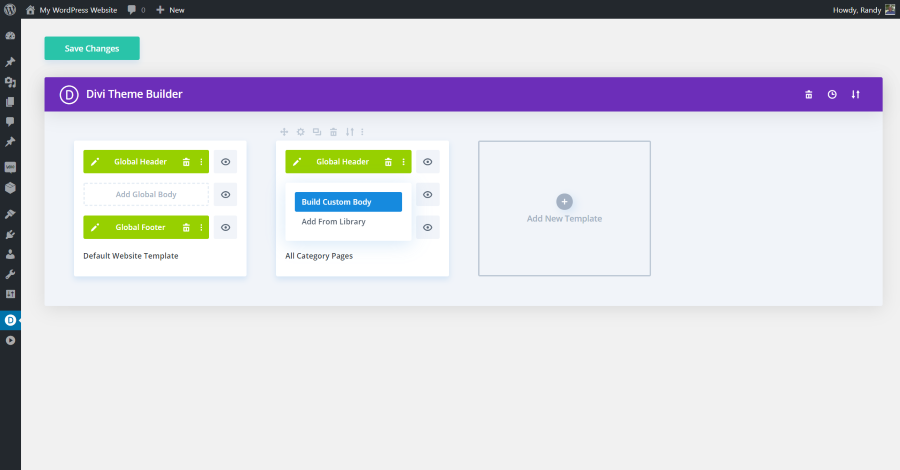
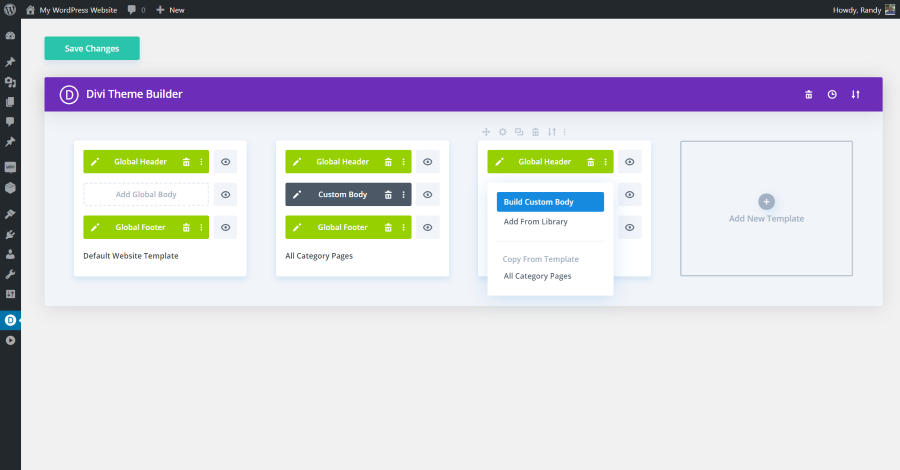
Divi Theme Builder Workspace

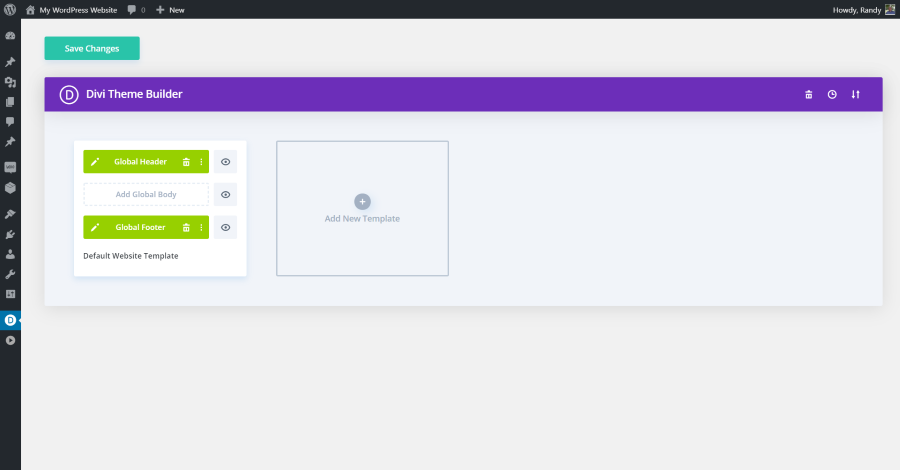
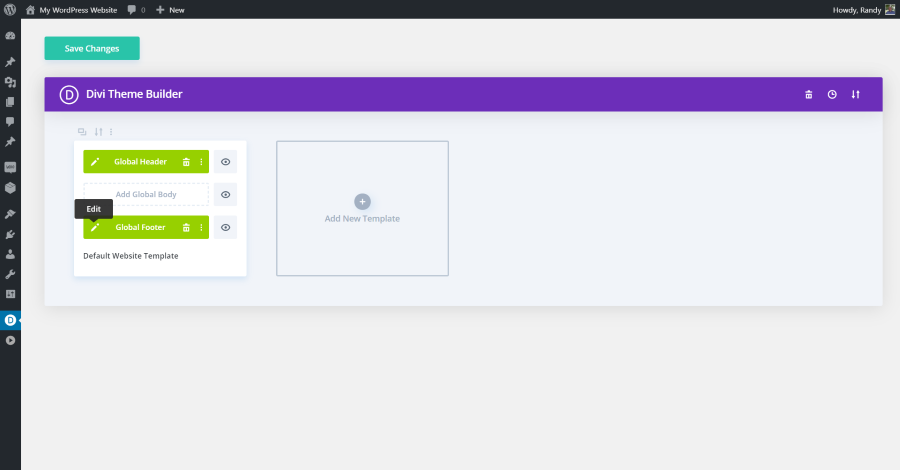
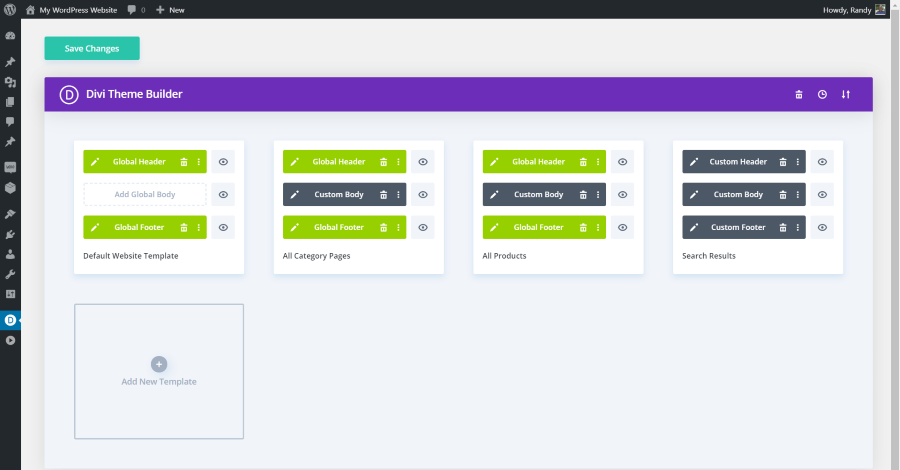
A new menu item is added to the Divi dashboard menu called Theme Builder. Clicking this opens a workspace area with blocks. The block is a template with elements that are built with the Divi Builder. Each template contains three smaller blocks within them: one for the header, one for the body, and one for the footer. You can add as many templates to this workspace as you want.
The first template is global, but it can be overridden by any template you wish for any post-type you wish. It can get confusing if you have a lot of templates that override each other. Fortunately, the label for each template does help clear up any confusion.

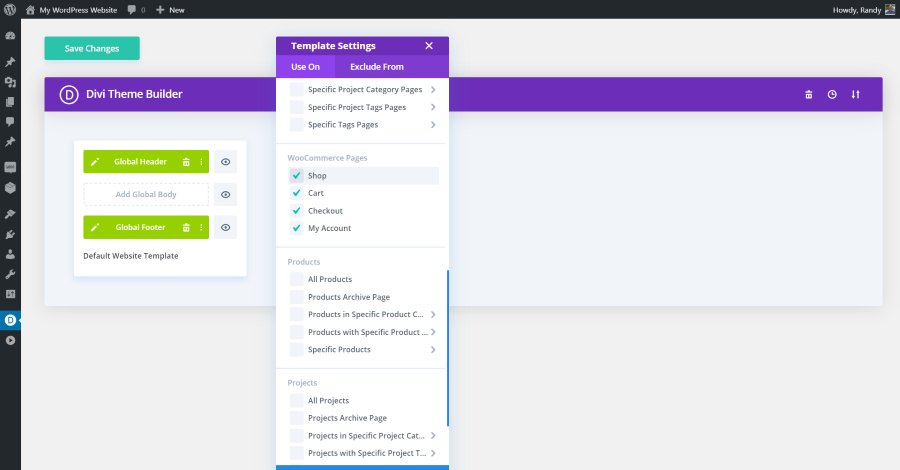
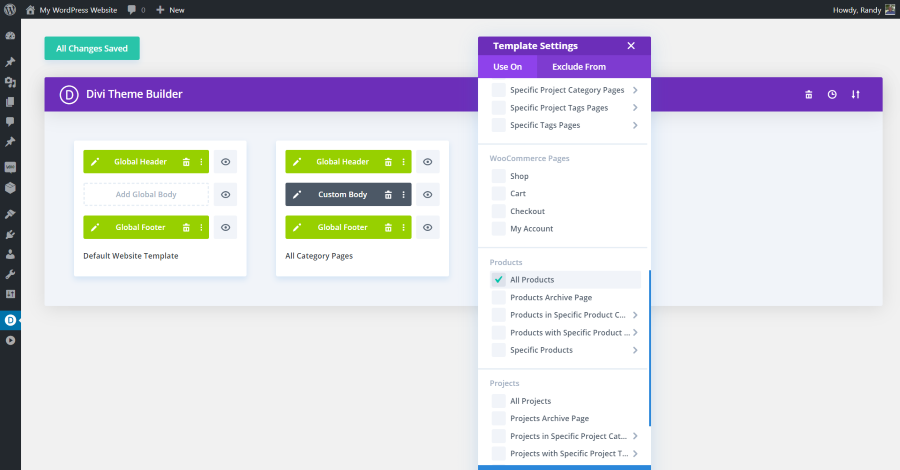
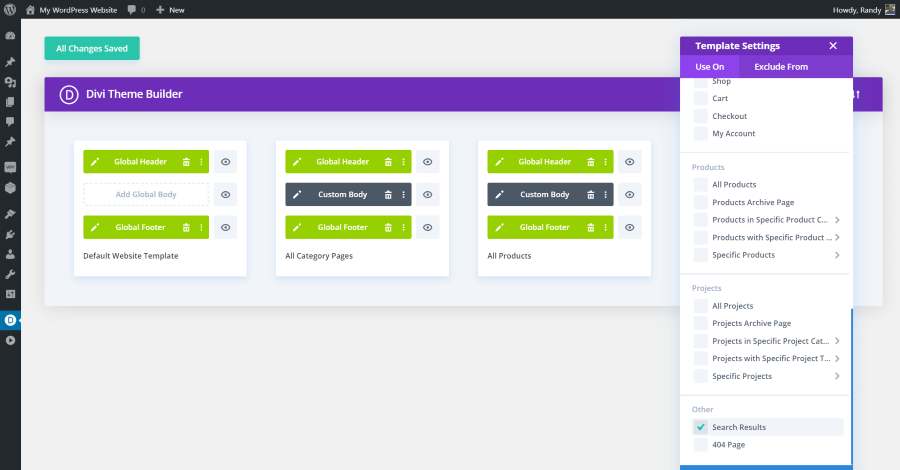
The templates can be assigned to pages, posts, archive pages, WooCommerce pages, products, projects, or other (a search page and a 404 page). They can be assigned to all, specific categories, tags, specific posts, etc., for each of the post types. You can also exclude any page or post. Clicking Add New Template opens the template settings where you can choose the type of template you want to create.
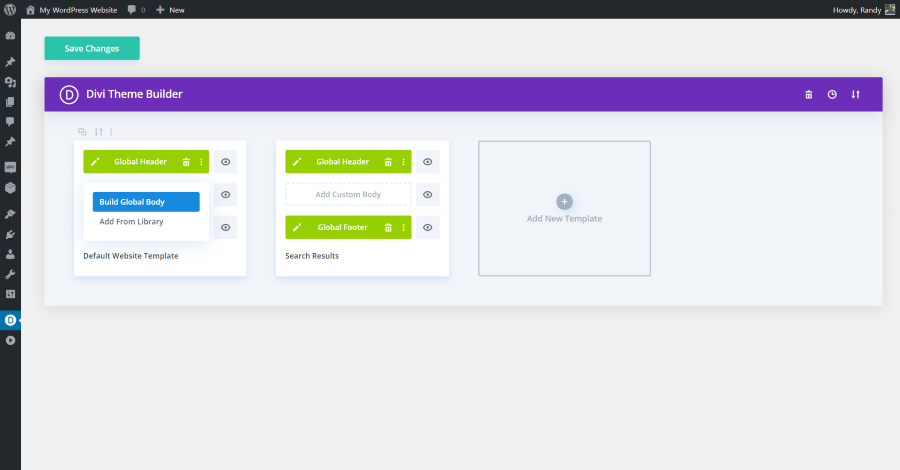
Clicking on any of the elements (header, body, or footer) opens a dropdown box where you can select to build a global template or add from the Divi library. Click the eye to enable or disable the layout on the frontend. Use the menu that appears above each theme to move it, duplicate it, edit, and export it.
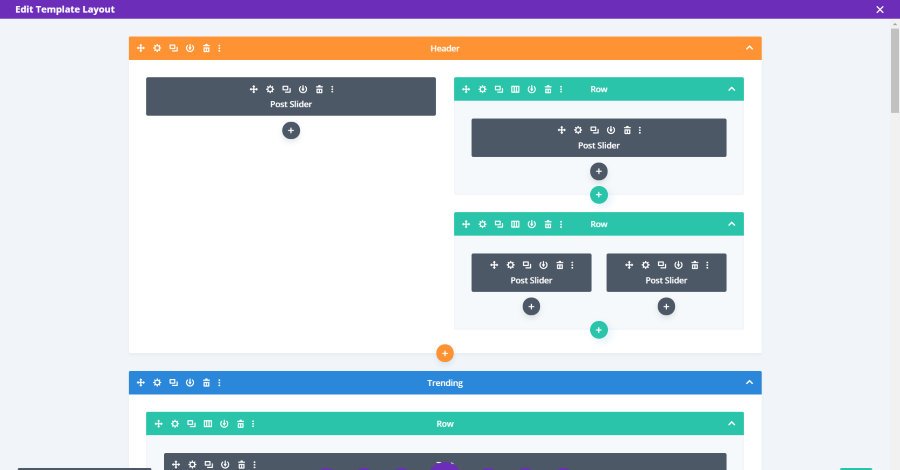
Selecting to build opens a Visual Builder within the Theme Builder workspace where you can create the layout. This builder has a few features that are unique to the Theme Builder. For example, it includes a post module that’s not available in the normal Divi Builder.
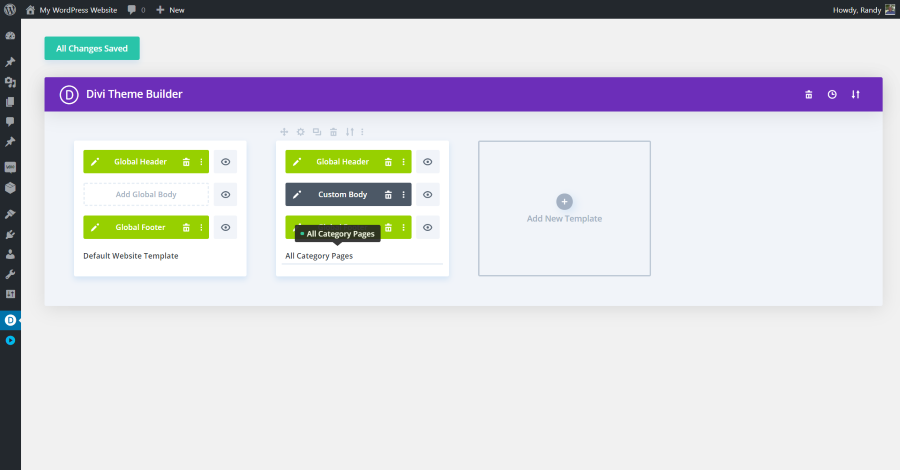
It identifies the theme’s assignment so you can tell at a glance what each theme is for. In this example, the new theme is assigned only to category pages. All other pages will display the global theme instead.

You can copy another theme or import one. To copy, you can select the clone feature that appears at the top of the theme block when you hover over the theme, or drag and drop the elements you want. This leaves the originals in place and adds a copy of them in the location where you dropped it. I’ve copied the All Categories Pages theme (more on this later), but I want to use a different header and footer. Click on the header or footer and click Disable Global. I can now customize the layouts. Another option is to delete them and create a new layout.
Import and Export

You can create your own layouts or import layouts from other sources. Elegant Themes has created several Theme Builder layouts as a starting point. Once you design the layout the way you want it, simply export it to use it on other websites. When you import, you can select for the layout to override the default website template, allow it to override existing assignments, and download a backup before importing.
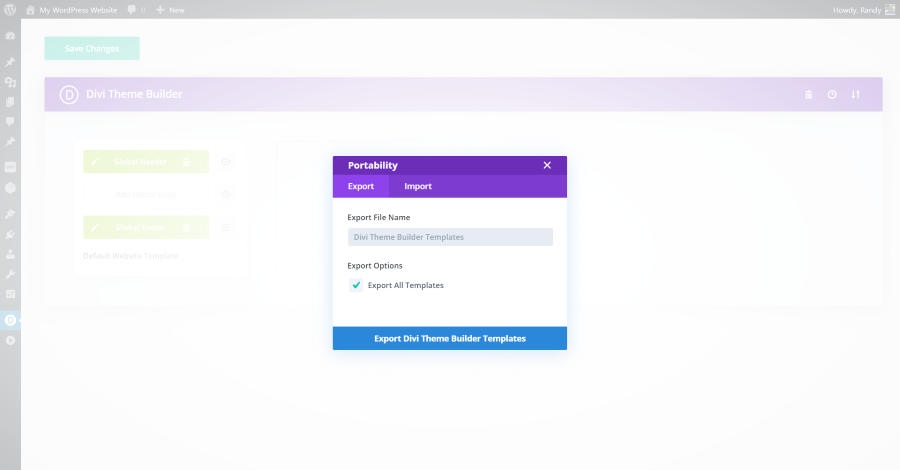
To export, you can enter the name of the file or select to export all templates.
Creating Header Templates
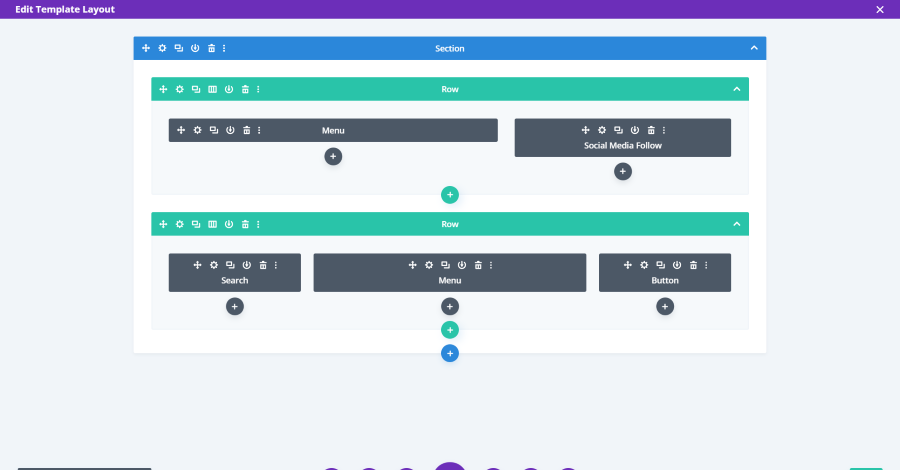
Clicking Header opens a builder where you can use any Divi module. Place your modules and style them as normal. I’ve added two rows. The first includes the new Menu module and a social media follow module. The second includes search, menu, and a button to create a call to action.
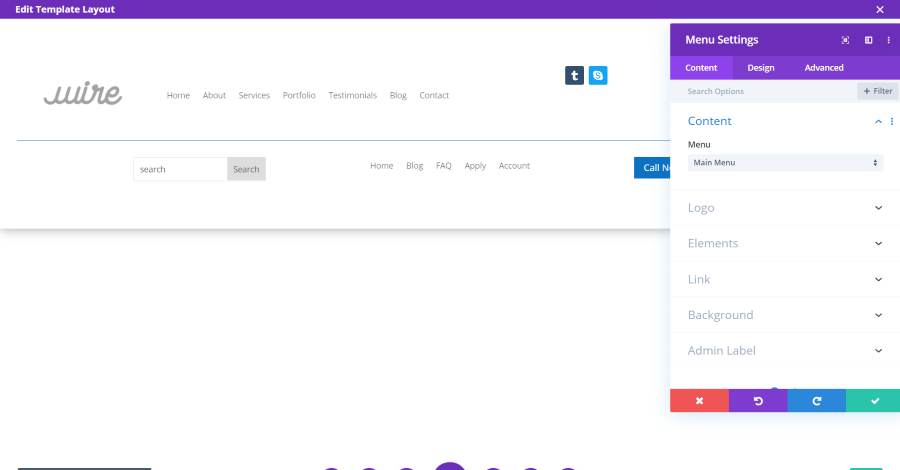
I’ve added a logo to the first menu module and selected the main menu. I’ve also added a border to the bottom of the row. For the second row, I did not add a logo. I selected a different menu to display in this location. I also styled the button with a blue background and white text. Save and exit when you’re done.
Click save changes in the main Theme Builder menu. Since this header is global, it will automatically be placed at the top of every page unless you override it with another header.
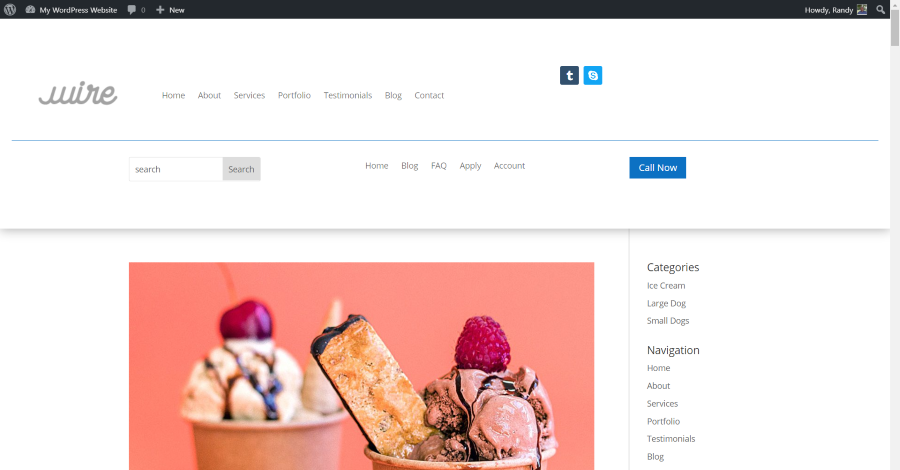
Here’s the main page displaying the header.
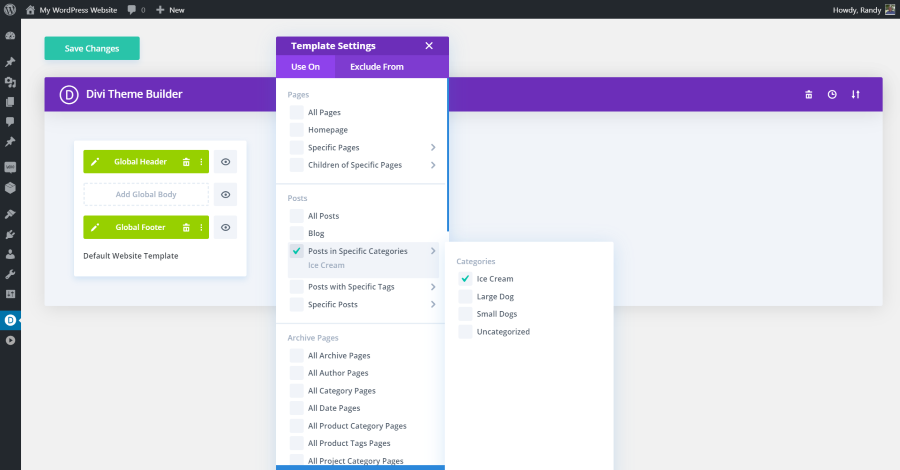
It’s also possible to create a header that displays only on certain pages, posts, or post types. Click Add New Template and choose where you want it to display. You can also choose where you want to exclude it. In this example, I’m creating a new header that will only display on blog posts with the category Ice Cream.
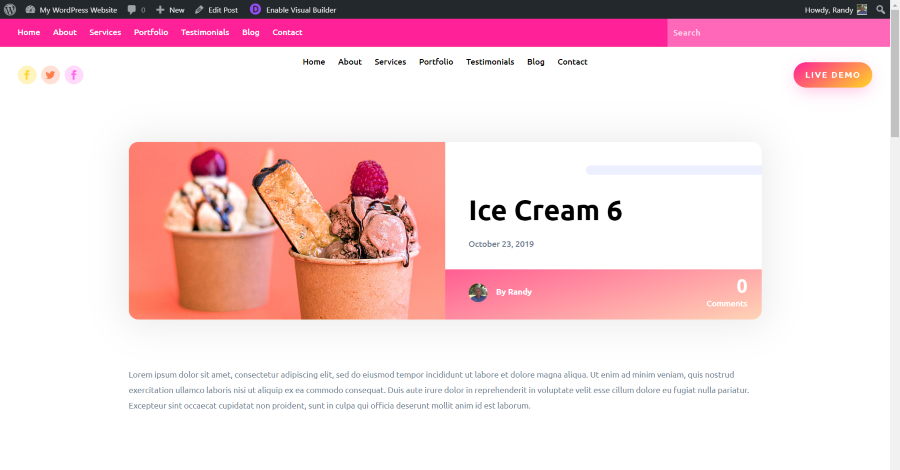
The header now appears on any blog post with the category I chose, and on no other pages or posts. This is the header from the 6th Theme Builder layout from Elegant Themes.
Creating Footer Templates
I’ve uploaded a header and footer layout from the 4th Divi Theme Builder layout pack. It’s assigned as global.
Here’s a look at the layout in the Theme Builder.
Just like the header, you can create a custom footer for any page or post type. I’m creating a custom footer that will only be used on WooCommerce pages (shop, cart, checkout, and my account).

It automatically uses the global header and footer, so I’m deleting the footer to create my own.
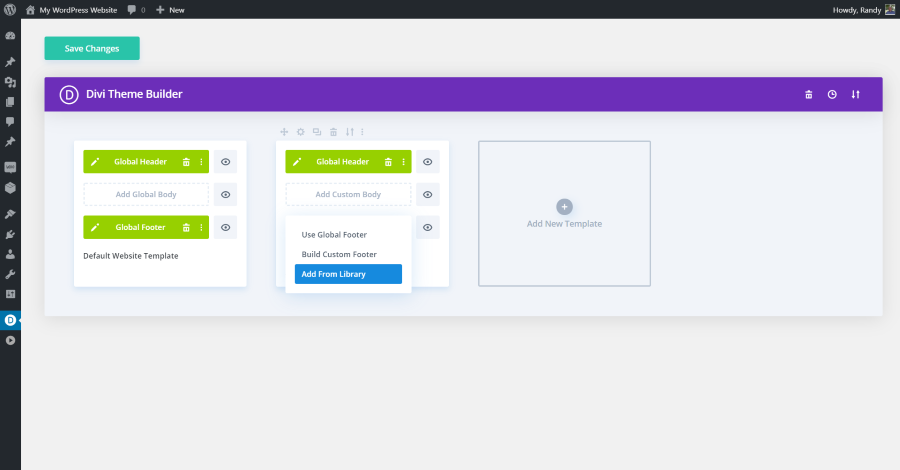
Click Add Custom Footer gives me the options to use the global footer, build a custom footer, or use a layout from the library.
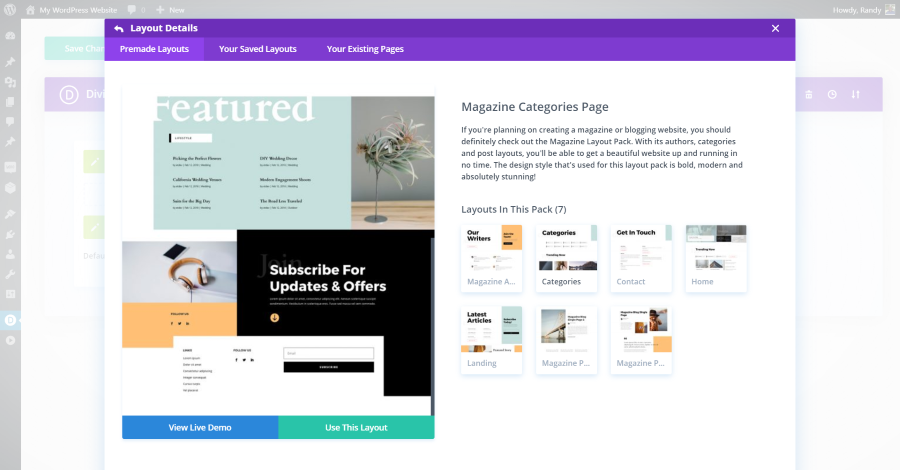
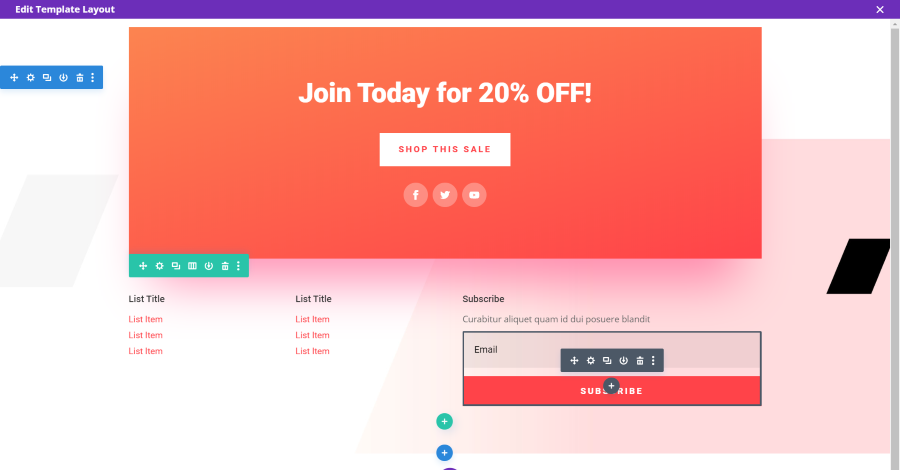
There are lots of amazing layouts already in the Divi library and they have pre-designed footers that I can use. I’m using the Magazine Categories Page layout.
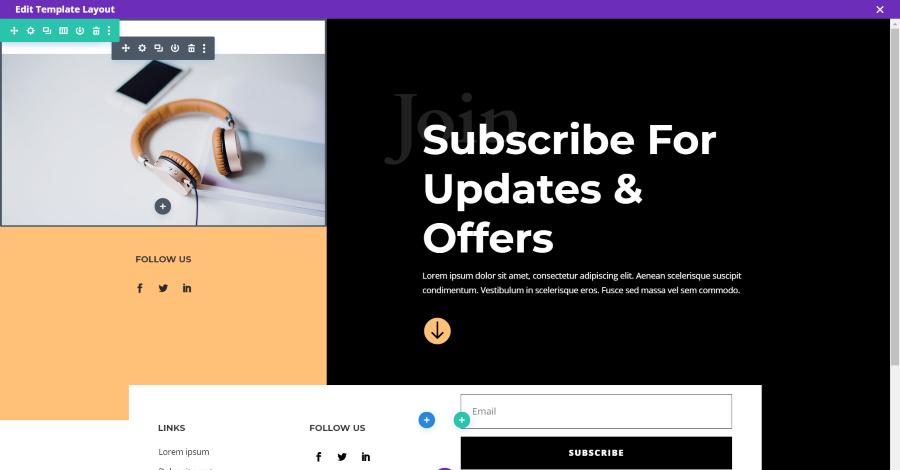
I now have a custom footer that I can edit. Since I used a full-page layout I had to delete the sections I didn’t want.

This left me with a styled footer that I can now have at the bottom of every WooCommerce page. This same method can be used to create custom footers for every page and post type.
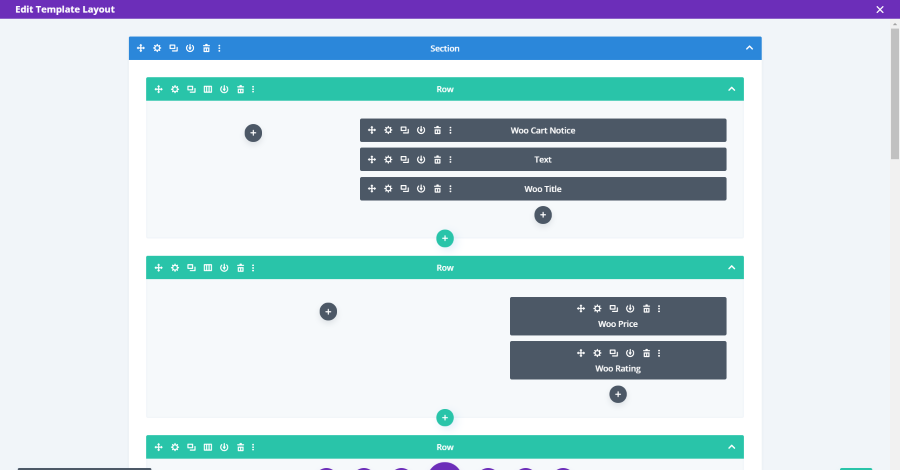
Creating Body Templates

To create a custom body, select to add a new template and choose its assignment. I’ve added a template to All Category Pages. You can also create a body template for a 404 page, product layout, etc.
Category Page Example
This creates the template and assigns it to All Category Pages. It automatically includes the global header and footer. I can then click on Add Custom Body and build it from scratch or add a layout from the library.
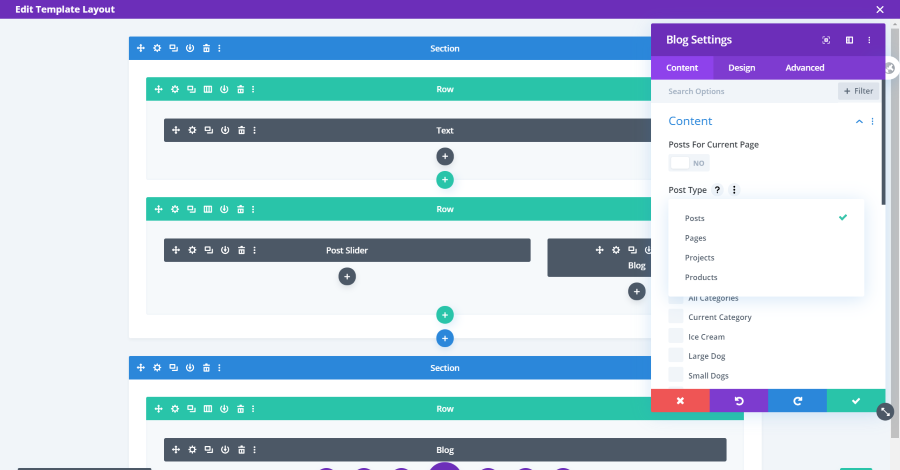
In this example, I’ve added three rows. The first has a text module with dynamic content. I’ve selected to show the category names. The second has a post slider with 1 post and a blog module with 3 posts. The third has a blog module with 6 posts in the current category. The blog module now has options to show different post types. I’ve chosen posts, but it can also show pages, projects, and products.
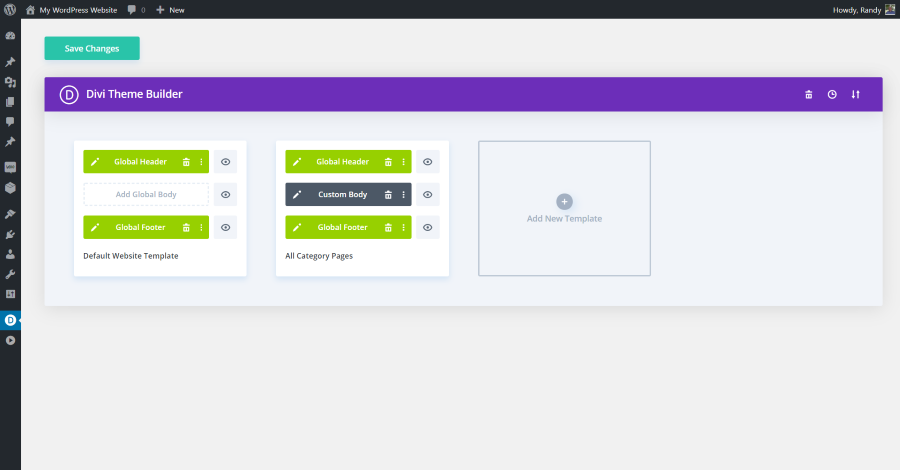
The custom body is now assigned to all category pages.
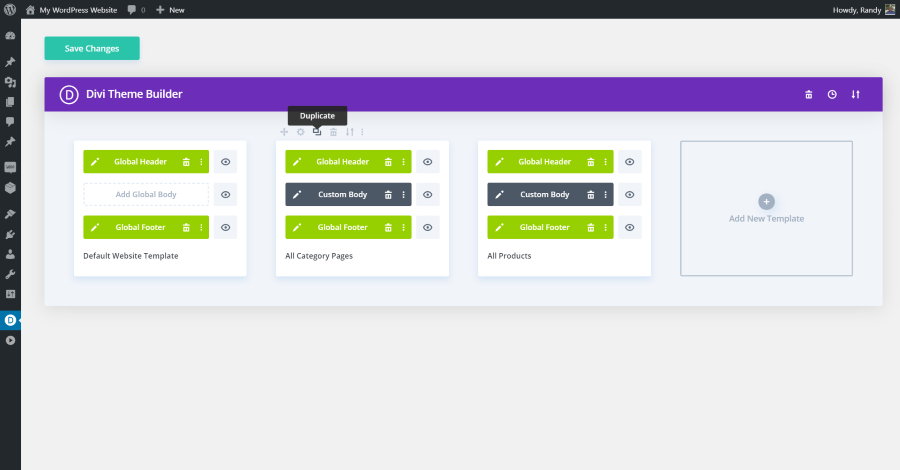
Products Page Example
Next, I’ll create a layout for All Products. Choose the assignment from the list and click Create Template.
It automatically added my global header and footer. Clicking on Add Custom Body lets me build from scratch, add from library, or copy from an existing template in the Theme Builder.
Add your WooCommerce and Divi modules to create your layout. Alternately, you can import one of the Elegant Themes Theme Builder layouts as I’ve done here. This is the product page from the 3rd layout.
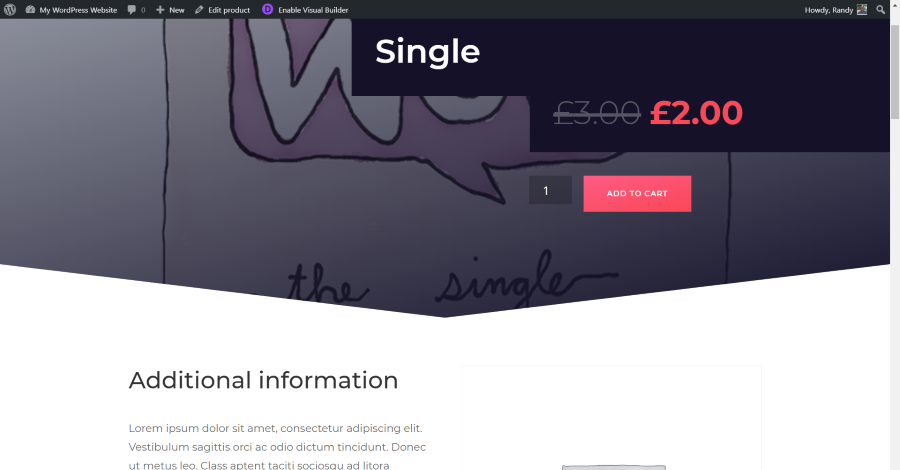
All of my products now use this layout.
Search Results Page Example
Next, I’m creating a Search Results page. I want to duplicate the All Categories Pages theme and add a new header and footer.
Once you duplicate a theme, the Template Settings opens so you can assign it. I’ve assigned it to Search Results.
I’ve now disabled global so I can customize the header and footer.

I’ve used several Elegant Themes layouts to build my Search Results page. This is how it looks on the front end. Since it can include multiple posts, the category page layouts are great for search results pages. This page also has a different header than the rest of the site.
Ending Thoughts
That’s our look at how to use the Divi Theme Builder. One thing I’d like to see is a Theme Builder Library. This way, we wouldn’t have to upload the same layouts into the Theme Builder. I’d also like to see Elegant Themes add Theme Builder layouts to their weekly Divi layout packs.
The Theme Builder is actually easy to use, and it adds a lot of design potential to Divi. We highly recommend Divi and the new Theme Builder.
We want to hear from you. Have you tried the Divi Theme Builder? Let us know what you think about it in the comments.


0 Comments