Divi Contact Form Helper Plugin
As the name suggests: Divi Contact Form Helper by Pee-Aye Creative is like an assistant to Divi’s existing contact form. It’s a third-party plugin that adds 100+ custom settings and features to the contact form module, including file uploads, field text options, storing URL parameters to a database, a date/time picker, additional design settings, and more.
In this article, we’ll look deeper into the Divi Contact Form Helper plugin’s installation and the different ways you can add advanced functionality, and completely customize it to help you determine if it’s the right choice for you.
Installing the Divi Contact Form Helper Plugin
Once you have downloaded the Divi Contact Form Helper Plugin, the installation steps are simple. First, log in to your WordPress account and go to ‘Plugins’. Select ‘Add New’ from the list. Simply drag or upload the zip file and click ‘Install Now’.
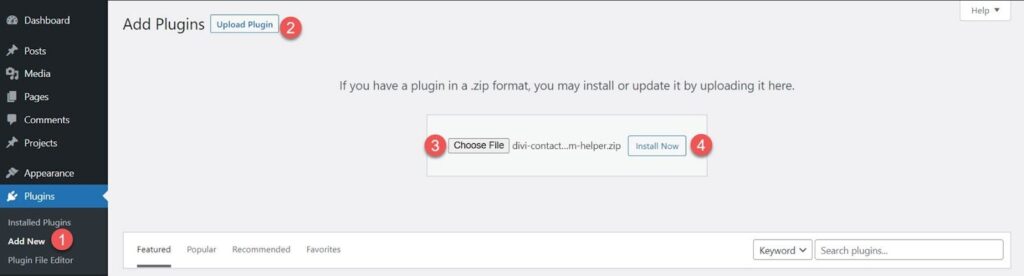
Installing the Divi Contact Form Helper Plugin on your WordPress Site
Once installed, the next step is to activate the plugin. Click on ‘Activate Plugin’ and your plugin is activated.
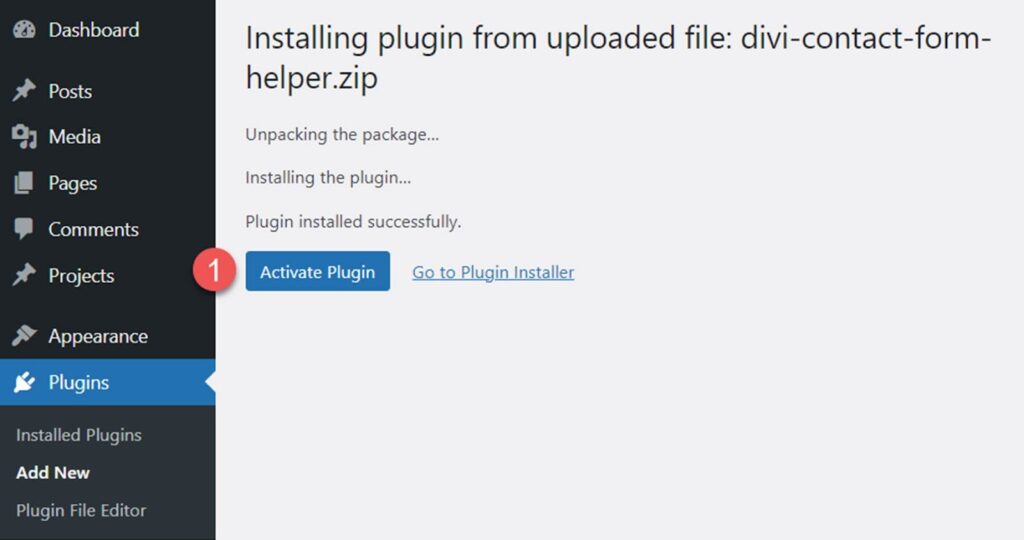
Activating Divi Contact Form Helper Plugin
Once the plugin is activated, you’ll see a new ‘Divi Contact Form Helper’ tab appear on the ‘Divi Theme Options’ page in your WordPress dashboard, along with 100+ additional features added in the contact form module in the Visual Builder. With these functions, you can modify your contact form however you want.

Divi Contact Form Helper Settings tab in Divi Theme Options
Let’s explore the unique functionality and settings of the popular Divi Contact Form Helper Plugin.
What makes Divi Contact Form Helper different?
While Divi’s built-in contact form with all the basic functionality, such as input fields, an email field, textarea, checkboxes, radio buttons, and more, you can customize every aspect of the contact form with The Divi Contact Form Helper plugin. This will help you interact with your visitors effortlessly and tie more connections with your audience.
Divi Contact Form Helper Dashboard Settings
In the ‘Divi Contact Form Helper’ tab, you’ll find 5 categories: Miscellaneous, SMPT Integration, Spam Protection, Automation, and Custom Text. All these options help you automate your tasks and make changes based on your preferences.
Miscellaneous
In the Miscellaneous settings, you can turn on contact form stats, keep track of sent emails, enable clone logs, decide to delete plugin data when uninstalling, and edit the allowed file types.

Miscellaneous tab in Divi Theme Options Settings
SMTP Settings
Click the button in the SMTP settings tab to activate SMTP settings. Once activated, you’ll find options for SMTP host, SMTP from email, SMTP from name, Encryption, SMTP port, Auto TLS, and Authentication. You can also check if the SMTP integration is working by using the provided button.
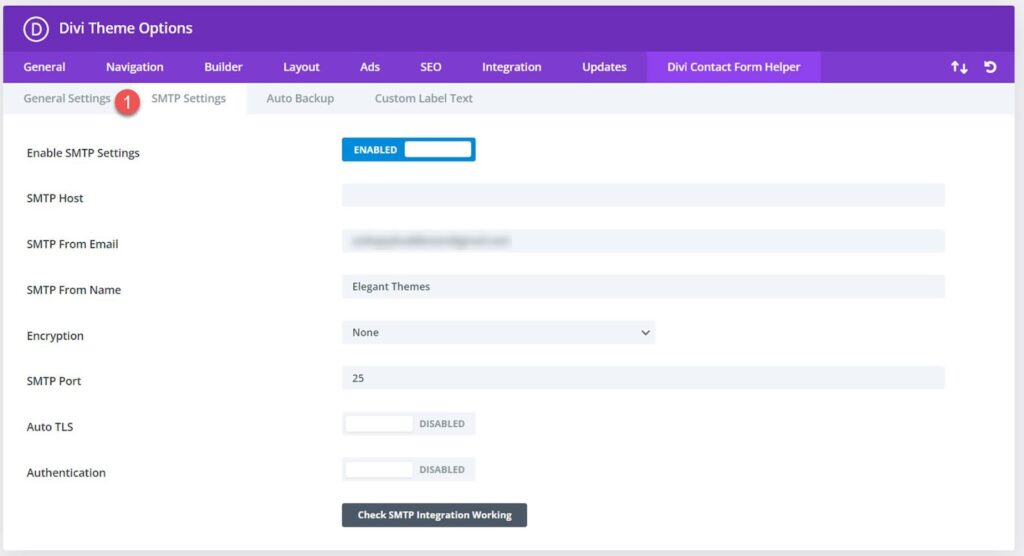
Divi Contact Form Helper’s SMTP Settings
Spam Protection Blacklisted Emails
In the Spam Protection tab, you’ll see a Blacklisted Emails field. People added to this list will not be able to send you an email nor do they appear in your database. Simply put any domain, such as @domain.com, or email address in the Blacklisted Emails field and you’re good to go. You can add multiple domains or email addresses by separating them with commas.

Blacklisted Emails field for Spam Protection
Auto Delete Entries From the Database
Sometimes you have to delete old entries for GDPR compliance, storage purposes, or any other reason. Divi Contact Form Helper has made this possible with its new feature: Auto Delete Entries. You can implement this from the Automation tab, the latest functionality added to the Divi Contact From Helper.
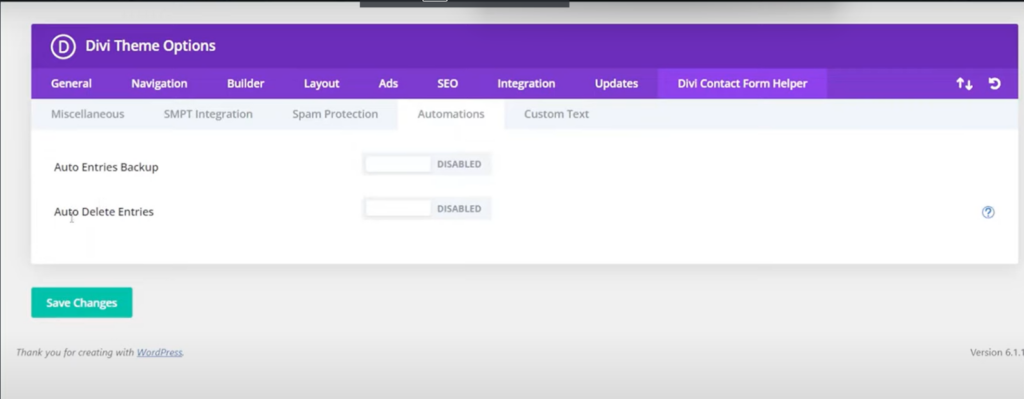
Enable Automation for Divi Contact Form Helper
Upon enabling that, further options will be revealed: Read, Unread, Trash. You can decide what type of entry you want to delete. Enabling any option will delete the entries from the database. You can also select the number of days after which the entries are deleted.
Title: Selecting Entries Type to Delete
Alt Title: Toggle from read, unread, and trash to decide which entry to delete along with mentioning the number of days after which the entry will be deleted in the Divi Contact Form Helper plugin.
Contact Form Settings
In the contact form settings, you’ll find different options to manage entries, Email templates, Export CSV, etc. Let’s take a closer look at how different options work and how they can help you manage your Contact Form more conveniently.

Contact Form Settings from the WordPress Dashboard
Entries
You can find all your form submissions on the Entries page. Each entry includes a number, email address, read status (showing who read it and when), form ID, date, and IP address. The entries can be sorted by read and unread like any other WordPress window.
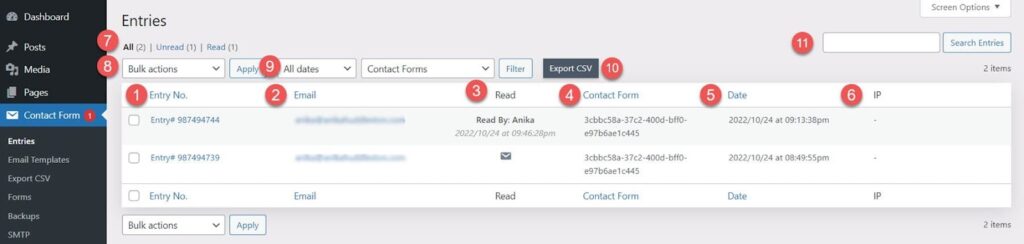
Viewing Entries in the WordPress Dashboard
You can also view individual entries by clicking any entry. Here you can view all the entry details of the user and all the entries made by that user. You also have the option to delete that entry, send an email to that entry, or reply to that entry. You can also design an email template, which is very helpful.
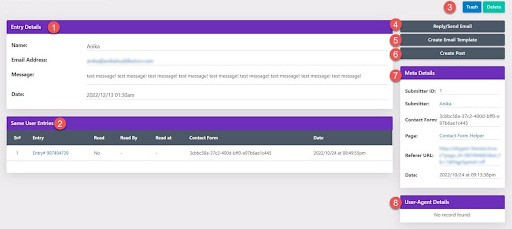
Viewing individual entries
Send Email
In the Send Email Tab, you can enter the email address, the email subject, the reply to the email address, and the message. You can also use the tags listed in your message as well.

Sending Email
Start and End Date for CSV Export
Instead of exporting all the entries to the CSV, you can now select a date range with a starting and ending date. Go to Export CSV from the Contact Form option appearing in the WordPress Dashboard. Simply select the form, starting and ending dates, and click Export CSS.
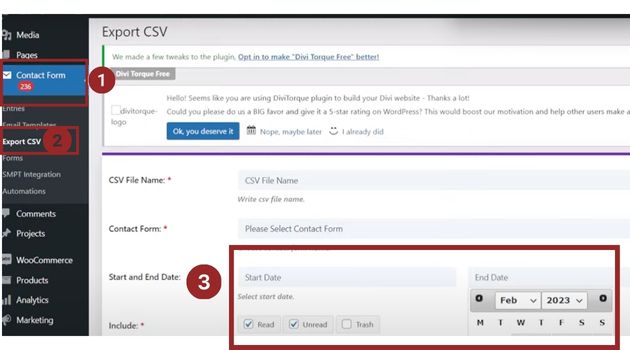
Selecting Start and End Date to Export CSV
Contact From Module Settings
Now, let’s begin by creating a new page and loading a contact form module from the Divi Builder. We’ll explore the unique functionality and settings of the popular Divi Contact Form Plugin from here on.
Contact form module settings are distributed over three tabs: Content, Design, and Advanced. Content settings are the main essence of Divi Contact Form Helper with unique functionality, whereas Design and Advanced Settings are comprised of regular standard settings and options. Once you’ve added the contact form to your website, you’ll be able to see the extended settings of Divi’s Contact Form Helper plugin in the Visual Builder.
Let’s explore the customizing possibilities you’ve within these settings.
Divi Contact Form Helper Settings
Field Settings
In the field settings, you have the control to show or hide the field label, and placeholder, enter custom placeholder text and description text, and more. You can also set a minimum and maximum message length, change icons, select allowed symbols, or modify the minimum height of the text area.
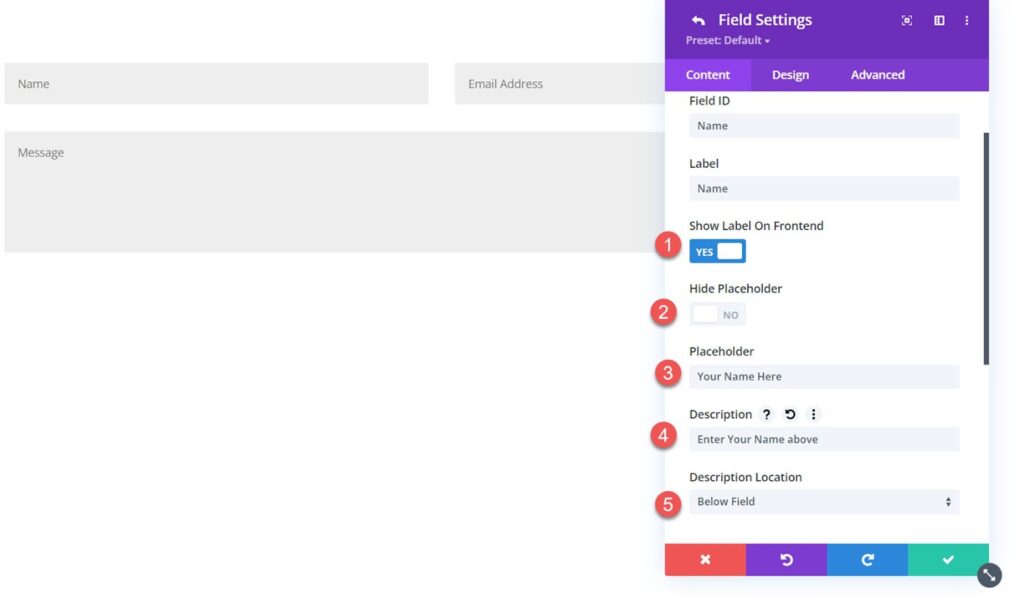
Field Settings for Divi Contact Form Helper
In the design settings tab, you can customize all these features like any other module. You can change font, text color, size, spacing, alignment, etc. It’s all in your hands!
Date Time Settings
With the time settings, you can set custom time settings for each day, such as the available and unavailable times for every day. This is helpful when you’ve different availability times every day. Instead of setting global times, which means the same timings for each day, these different time settings give you the flexibility to manage your schedule. You can also disable past dates, turn off the current date, and choose minimum time. But remember that these adjustments will override the global time settings if you’ve any.

Enter available and unavailable times
For the design tab, you can change the background color, adjust margins, padding, borders, and shadow settings. Moreover, you can change the date picker’s width and height, customize text settings, text color, and all the default design settings to your date and time settings.
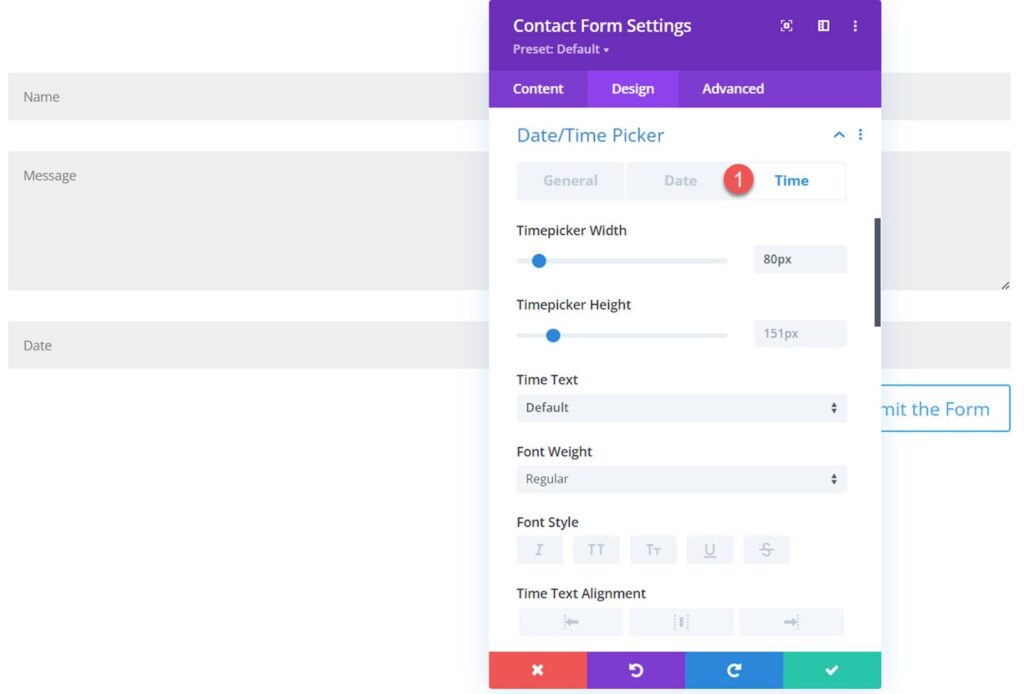
Design tab for Date/Time Picker
Note: The date and time settings show up only when you choose “input field” as the field type.
ICS Calendar
This new feature added to the date/time picker tab in Divi’s contact form module is going to amaze you. With the ICS calendar in the time and date picker tab, you can synchronize your Google Calendar and Outlook settings with ICS Calander.
All you need to do is create a URL of your .ics calendar feed and toggle it to initiate it. This will synchronize the dates and times according to Google Calendar, disabling all the allotted dates and times in the contact form.
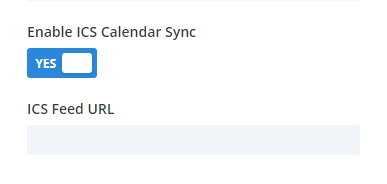
Enable ICS calendar
Note: ICS Calendar is a beta feature which means it’s still in the testing phase.
Confirmation Email Settings
You can now send a Confirmation Email with a custom name and custom Email. This means that the email will be sent as a name label for Confirmation Email From Name in the recipient’s inbox. Similarly, you can enter a custom email address for the Confirmation Email From Email Address to appear in the recipient’s emails with the sender’s email address.

Confirmation Email Settings
Other than this, you can enter a custom subject line, a custom message, enable rich text formatting, and many more.
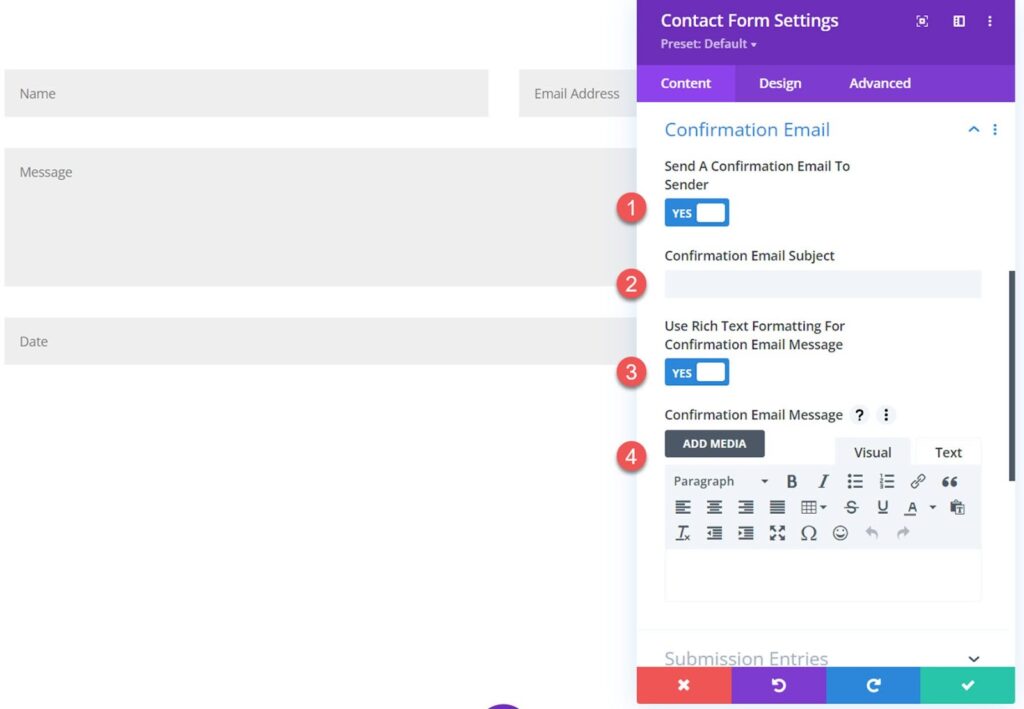
Customizing Confirmation Email Settings
Read More: Maximize your email marketing with the Bloom plugin
Submission Entries
In the submission entries settings, you can store entries in a database, store file uploads in a database, attach file uploads to emails, gather user agent details, use cookies to track unique form views and customize the message added to emails with files.
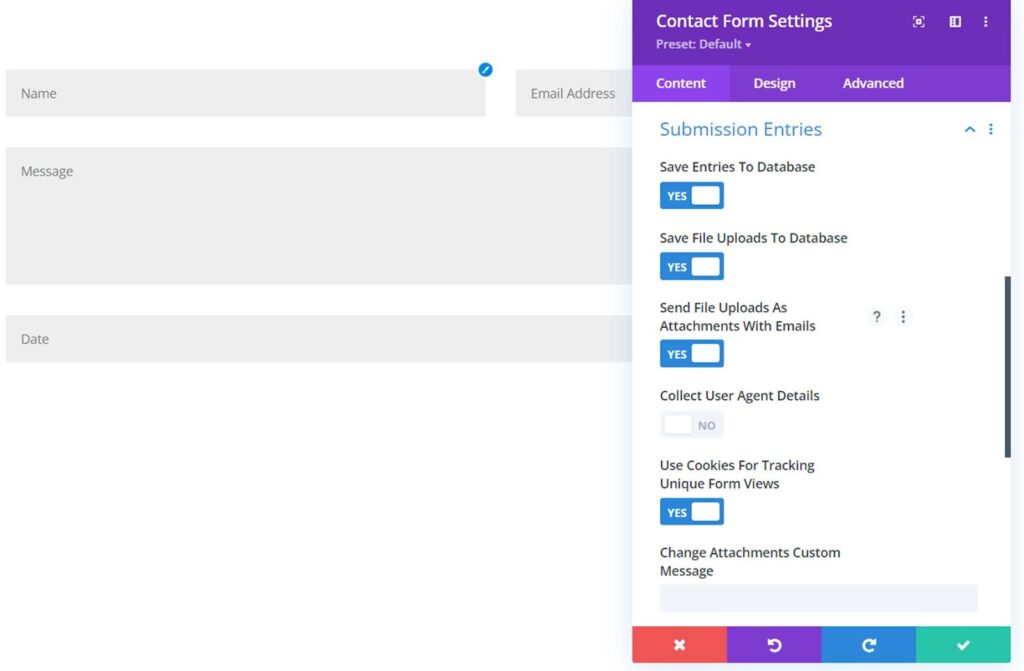
Submission Entries Settings
URL Parameters
If you enable the ‘Save URL Parameters To Database’ option, Divi Contact Form Helper collects all the information related to clicks, demographics, and several more parameters, and stores them in your database.

URL Parameter in Divi Contact Form Helper
That’s It!
I hope you enjoyed our in-detail review of the Divi Contact Form Helper plugin. With its feature-rich functionality and, you can take every aspect of the contact form. This plugin is your ground to accept files, schedule events, and more. The user-friendly interface simplifies managing message responses and tracking all the entries from the WordPress dashboard.
Additionally, the Divi Contact Form Helper is easy to use. I like how you can implement the default design settings for all its functionalities, giving you a truly personalized outlook.
What other features would you like to be included in the Divi Contact Form Helper plugin? Let us know in the comments below.


0 Comments