Bloom is known to be notoriously tricky to style. In this tutorial I’m going to show you how you can transform an inline Bloom optin into a beautiful optin for your website. We will go over setting up the optin, adding a beautiful background image with a gradient overlay, centering bloom in a fullwidth code module, making the entire Bloom area transparent, and creating a rounded corners submit button.
Here’s what we’ll be building together:

Live Demo – With a before and after
For this tutorial you are going to need both Divi and Bloom installed. Being familiar with CSS would also help so you can customize the styling to your needs, but it is not necessary.
Let’s begin!
Preparing Bloom
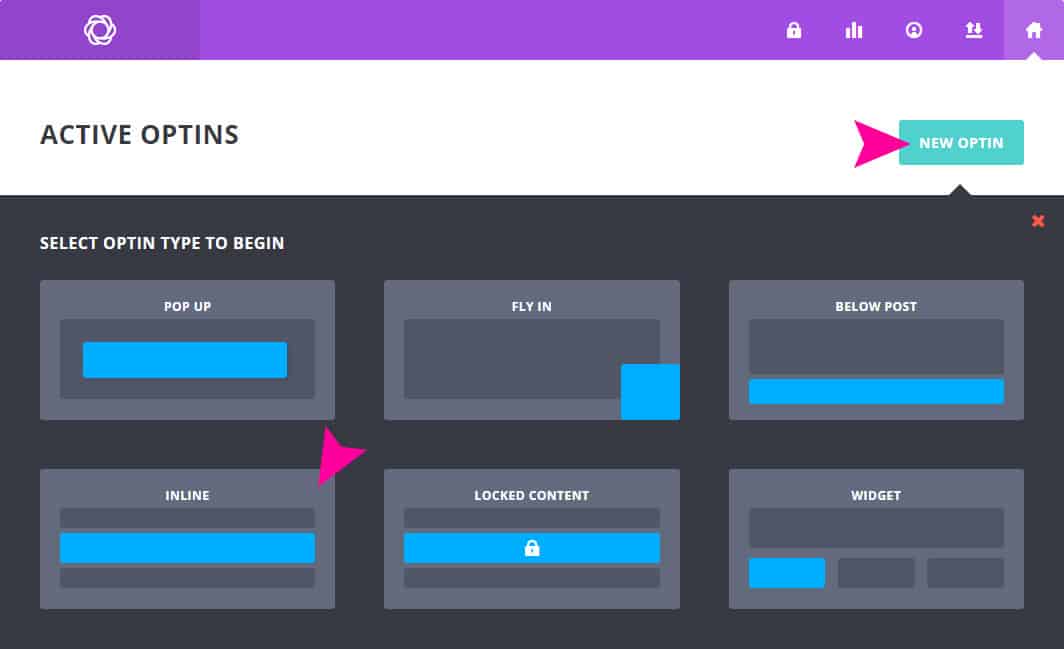
Create a new inline Bloom optin. Go to Bloom and click the New Optin button and select the Inline optin.
Name your optin whatever you’d like and select your desired email provider. Click NEXT: DESIGN YOUR OPTIN.
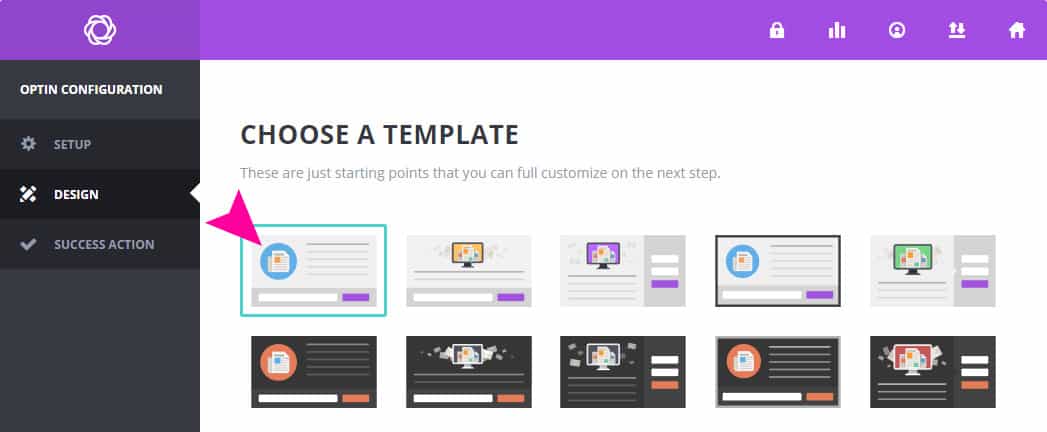
Choose the first template listed on the design tab and click NEXT: CUSTOMIZE.
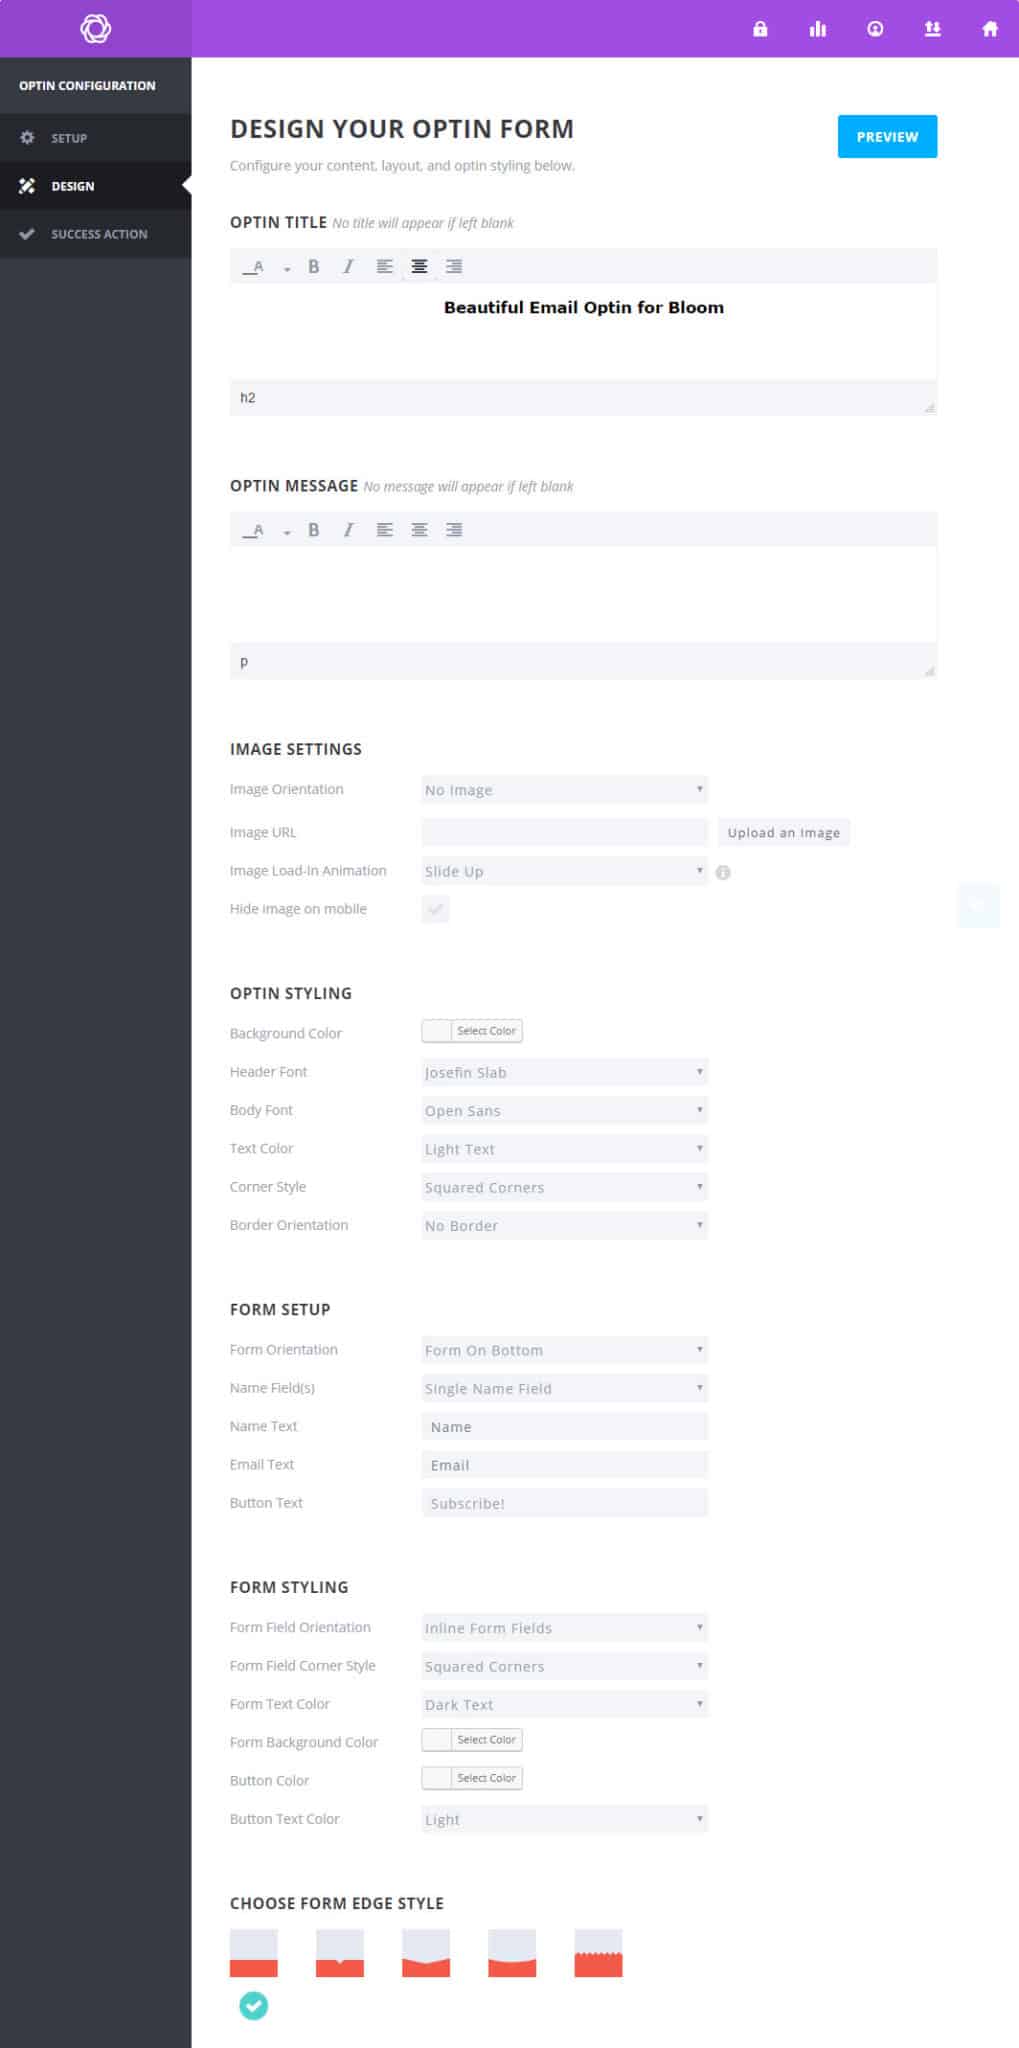
Next, we are going to set all of the required design settings. There are a lot of them, so make sure to read through carefully or pay close attention to the image below.
To start, we are going to:
- Set the Optin Title to any title you would like.
- Remove the Optin Message.
Under Image Settings we are going to set the following options:
- Set Image Orientation to No Image
Under Optin Styling we are going to set the following options:
- Click the Select Color button for Background Color and click Clear
- Set Header Font as Josefin Slab
- Set Body Font as Open Sans
- Set Text Color as Light Text
- Set Corner Style as Squared Corners
- Set Border Orientation as No Border
Under Form Setup we are going to set the following options:
- Set Form Orientation as Form On Bottom
- Set Name Field(s) as Single Name Field
- Set Name Text as Name
- Set Email Text as Email
- Set Button Text as Subscribe!
Under Form Styling we are going to set the following options:
- Set Form Field Orientation as Inline Form Fields
- Set Form Field Corner Style as Squared Corners
- Set Form Text Color as Dark Text
- Click the Select Color button for Form Background Color and click Clear
- Click the Select Color button for Button Color and click Clear
- Set Button Text Color as Light
To finish off the settings we are going to:
- Choose the first Form Edge Style
- Do not insert any Footer Text.
- Set the Success Message Text to whatever you would like.
Below is an image of the settings I used if you would rather copy an image.
Don’t click save just yet! We still have to add some Custom CSS.
Custom CSS
Next, we are going to copy and paste the CSS below into the Custom CSS box.
This first bit of CSS makes the optin rather slim, sets the header font size, and gives you more control over the optin’s padding in Divi.
/* === Slim Bloom Optin by Divi Cake === */
#dc_optin div.et_bloom_header_outer .et_bloom_form_text {
    padding: 0px!important;
}
#dc_optin div.et_bloom_header_outer .et_bloom_form_header {
    padding: 0px 0px 10px 0px!important;
}
#dc_optin div.et_bloom_header_outer .et_bloom_form_header h2 {
    font-size: 36px!important;
}
#dc_optin .et_bloom_form_content {
    padding: 10px 0px 0px 0px!important;
}
This second bit of CSS makes the submit button round and adds the transparent button background color and hover.
/* === Rounded Bloom Submit Button by Divi Cake === */
#dc_optin .et_bloom_form_content button.et_bloom_submit_subscription {
    border-radius: 50px!important;
    -moz-border-radius: 50px!important;
    -webkit-border-radius: 50px!important;
    background: rgba(255, 178, 0, 0.8)!important;
}
#dc_optin .et_bloom_form_content button.et_bloom_submit_subscription:hover {
    background: rgba(255, 178, 0, 1)!important;
}
This third bit of CSS makes the entire Bloom area transparent, and allows you to set a custom background image and gradient in Divi.
/* === Transparent Bloom Optin by Divi Cake === */
#dc_optin .et_bloom_form_container {
    background: none !important;
}
#dc_optin .et_bloom_form_header {
    background: none!important;
}
#dc_optin .et_bloom_bottom_inline {
    background: none !important;
}
This last bit of CSS makes the text fields slightly transparent to add just a little bit more style to the optin.
/* === Transparent Text Fields by Divi Cake === */
.et_bloom .et_bloom_form_container .et_bloom_form_content input {
    background: rgba(255, 255, 255, 0.9)!important;
}
.et_bloom .et_bloom_form_container .et_bloom_form_content input:focus {
    background: rgba(255, 255, 255, 1)!important;
}
Click the Save & Exit button.
At this point, we only have one last thing to do in Bloom. We have to generate and copy a shortcode.
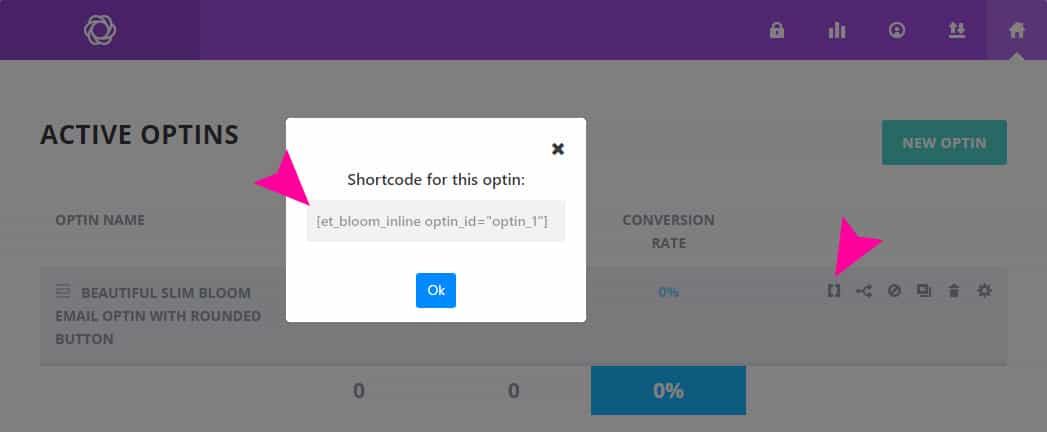
Once you click Save & Exit, you’ll be brought back to the Active Optins page in Bloom. We are going to click the Generate Shortcode icon and copy the shortcode in the popup box.
Keep that shortcode handy! We’re going to need it very soon.
Adding the optin to your page
Here is the rewarding part. We finally get to put all of this together in Divi.
Start by creating a new page, or editing an existing page. If you’re creating a new page, make sure to select to use the Divi Builder.
Add a new Fullwidth Section and insert a Fullwidth Code module.

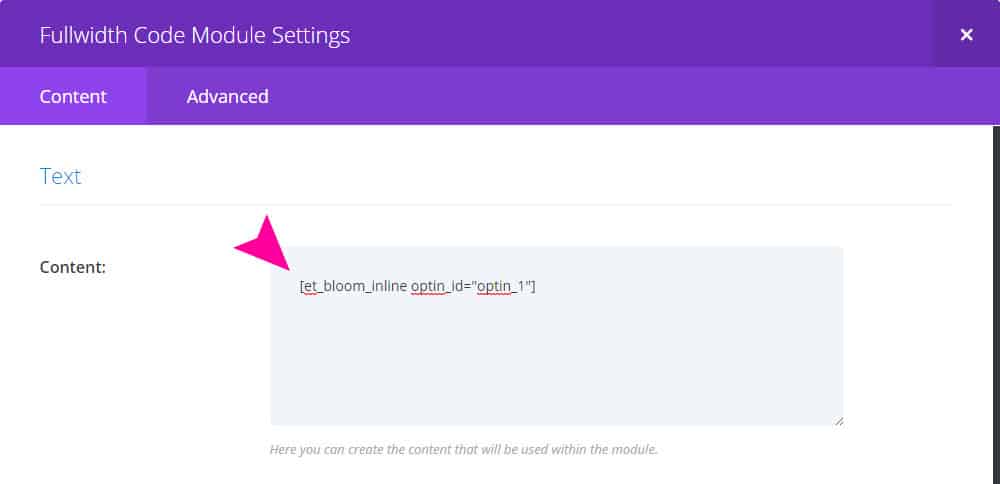
Enter the Fullwidth Code Module Settings and copy and paste the Bloom shortcode you copied earlier.
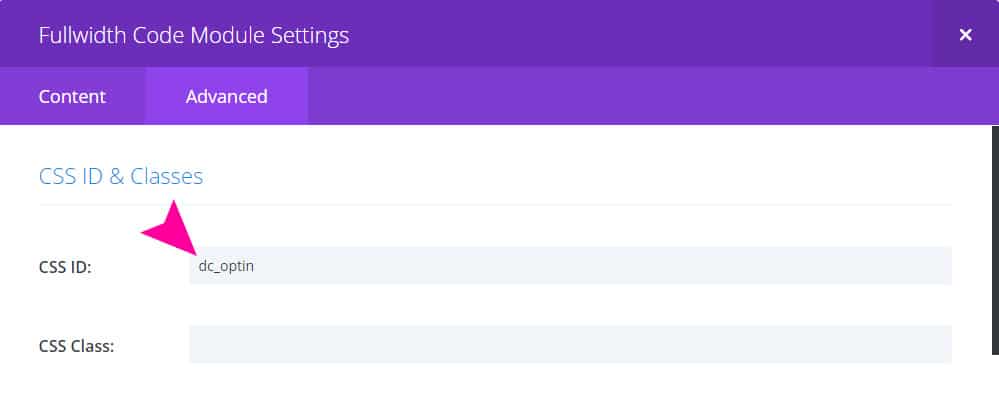
Next, we are going to enter the Advanced tab in the Fullwidth Code Module Settings to set the CSS ID to dc_optin. This will allow all of the CSS we entered earlier to apply to this code module.
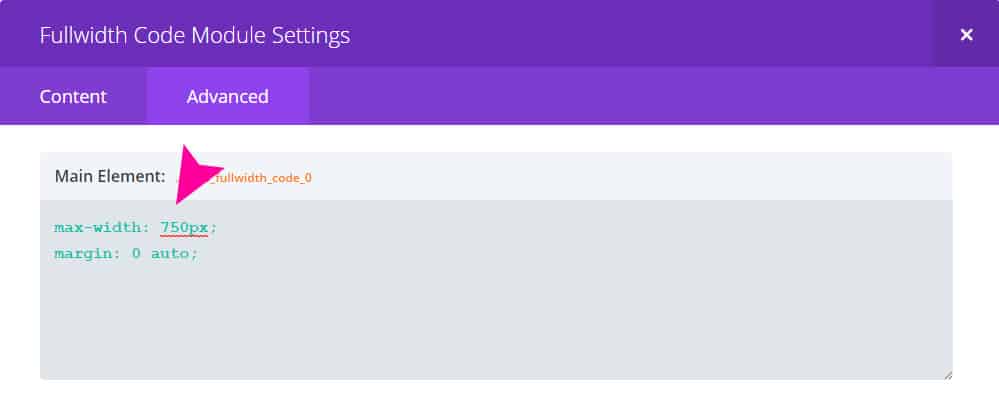
While we are still in the Advanced Tab, we are going to add two simple lines of CSS in the Main Element section. One to set a max-width, and another to center the code module within the fullwidth header.
Click Save & Exit. We are all done with the code module.
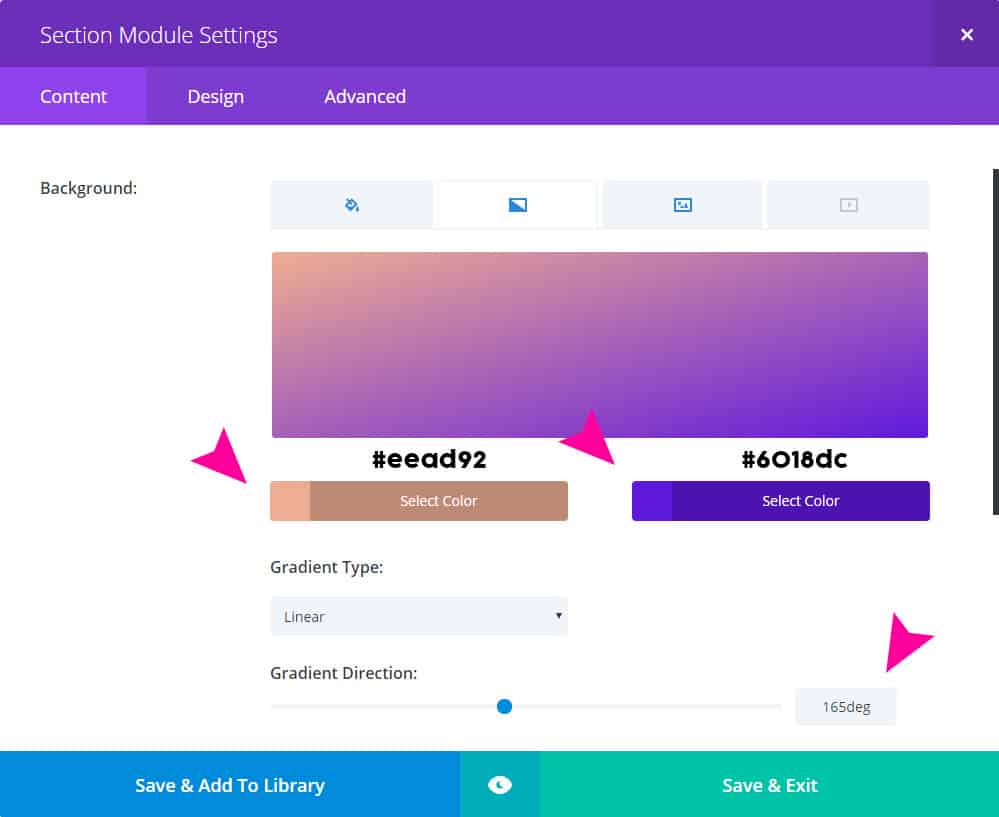
Now we are going to enter the Section Module Settings and set up the gradient.
We are going to use #eead92 as our first color and #6018dc as our second color. We are also going to set the Gradient Direction to 165deg.
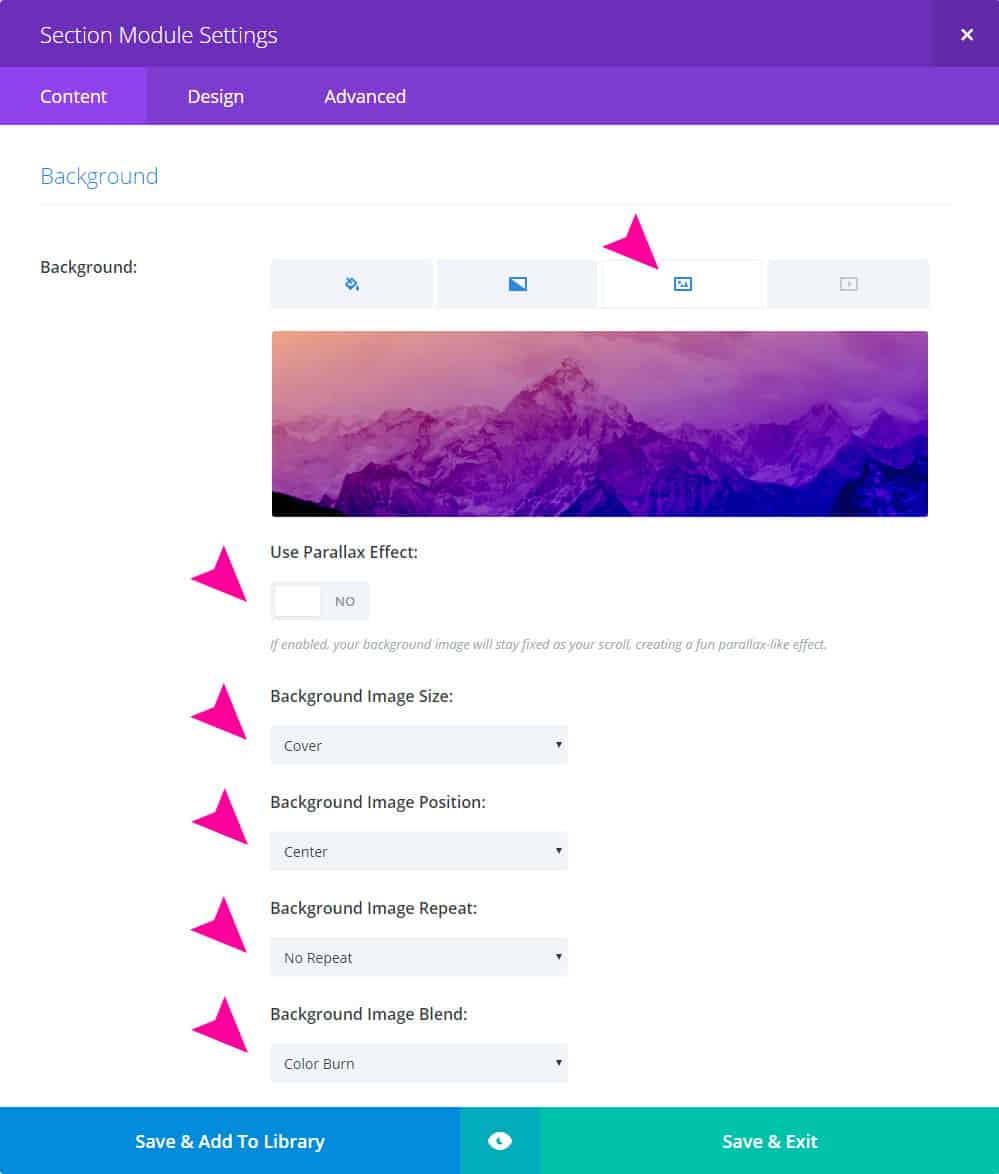
While we are still on the Content tab, we are going to add our background image. The background image I used can be downloaded here.
Complete the following in the Background section:
- Upload your own image or used the one I provided.
- Set use Parallax Effect to NO
- Set Background Image Size to Cover
- Set Background Image Position to Center
- Set Background Image Repeat to No Repeat
- Set Background Image Blend to Color Burn
Next, we are going to enter the Design tab in the Section Module Settings to add some padding.
Set the Custom Padding to 50px.
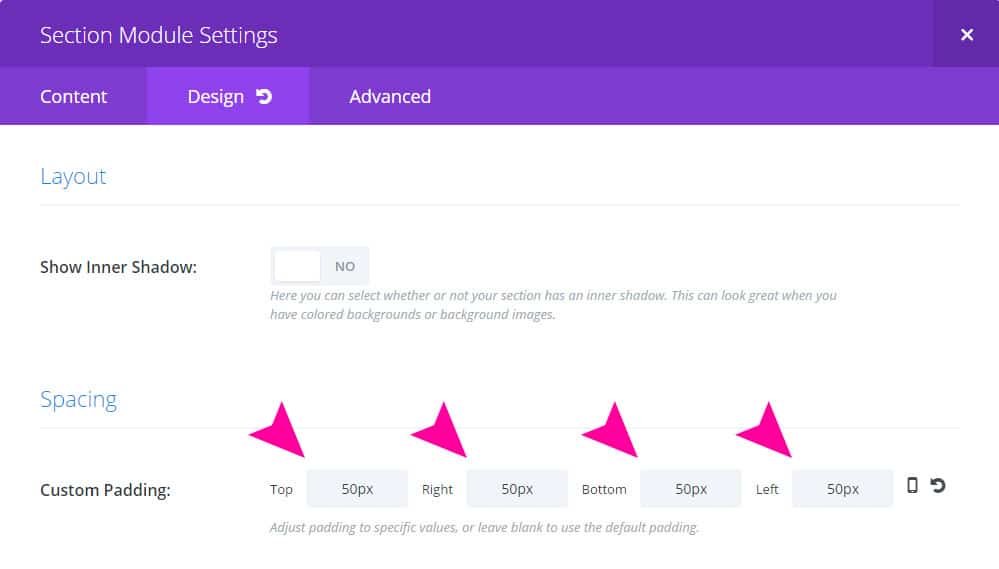
Click Save & Exit.
There you have it! You should now have a beautifully styled slim bloom email optin that looks like this:
Review
We successfully transformed an unattractive Bloom optin into a beautiful optin you could use on any website. I hope you have enjoyed this tutorial.
We’d like to hear from you. How did you use this optin on your website? Did you find it helpful? Let us know in the comments.


OK but you can get that to popup since it is made inside divi correct?